

Many SharePoint customizations use jQuery to communicate with SharePoint and show the results on the page. Here is how you could migrate such a customization to SharePoint Framework.
Communicating with SharePoint from an embedded client-side customization
Over the last few years, client-side SharePoint customization gained popularity. Using existing libraries and frameworks a big group of professionals could extend SharePoint with additional capabilities and solved business problems without costly development projects.
A common way of extending SharePoint with client-side customizations is by embedding scripts on the page using the Content- or the Script Editor Web Part. The embedded scripts become a part of the page and get access to context information such as the site title and URL. With that information, it can communicate with SharePoint either using its JavaScript Object Model or REST APIs.
Consider the following solution published by Julie Turner:
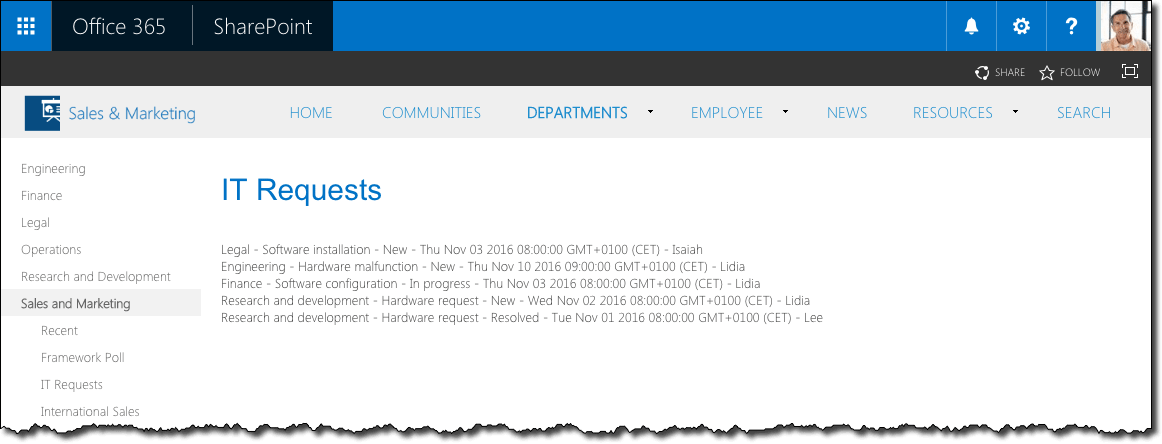
The source code of this solution is available on GitHub at https://github.com/juliemturner/demos/tree/master/ClientSideDev/RESTCall
The solution uses jQuery to retrieve list items from SharePoint using its REST API. The URL of the SharePoint site is retrieved from the _spPageContextInfo object already available on the page and provided by SharePoint.
By using jQuery to execute the AJAX call, Julie keeps the call simple and ensures that it will work the same way in every browser. To improve the performance of the solution, she loads jQuery from CDN.
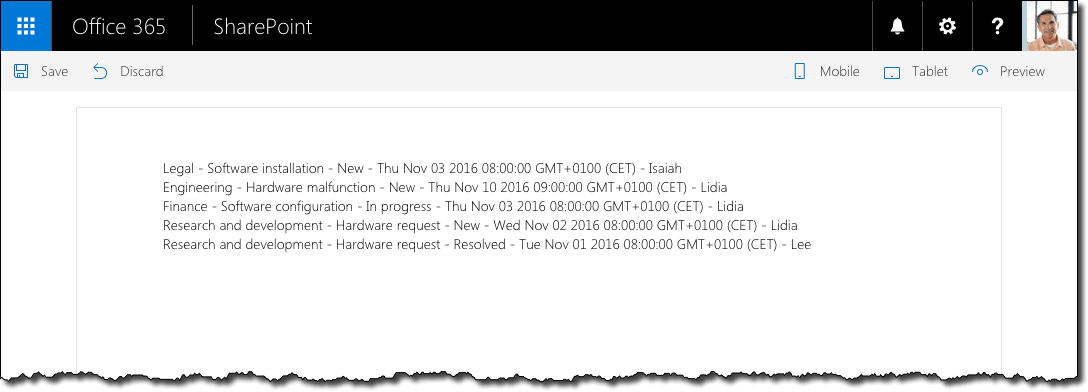
Once the results are retrieved, they are displayed in a list and assigned to a specific div on the page.
While the solution is very simplistic, it illustrates a common pattern used in many, if not all, SharePoint client-side customizations. So how would you migrate such customization to the SharePoint Framework?
Migrate JavaScript customizations with jQuery AJAX calls to SharePoint Framework
There are a number of ways in which you can migrate existing client-side customizations to SharePoint Framework that vary from reusing existing scripts to completely rewriting the customization to make the best use of the framework.
Before you start
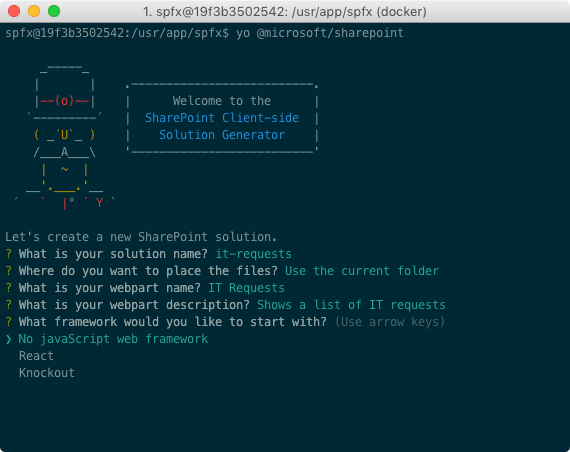
Before you start the migration process you will need a new SharePoint Framework project. Taking Julie’s solution as an example, which is built using jQuery and plain JavaScript, create a new project that doesn’t use any framework.
Reuse existing scripts
The first approach, one with the least effort, to migrate the existing solution to the SharePoint Framework is to simply reuse the existing script and apply only the most necessary modifications required for the script to work in the context of a SharePoint Framework client-side web part.
Load jQuery from CDN
In her solution, Julie loads jQuery from CDN by adding a script tag in the Script Editor Web Part. In SharePoint Framework we can achieve the same, by adding an entry in the ./config/config.json file’s externalssection:
{
  "externals": {
    "jquery": "https://cdnjs.cloudflare.com/ajax/libs/jquery/3.1.1/jquery.min.js"
  }
}
Add the existing script to the web part
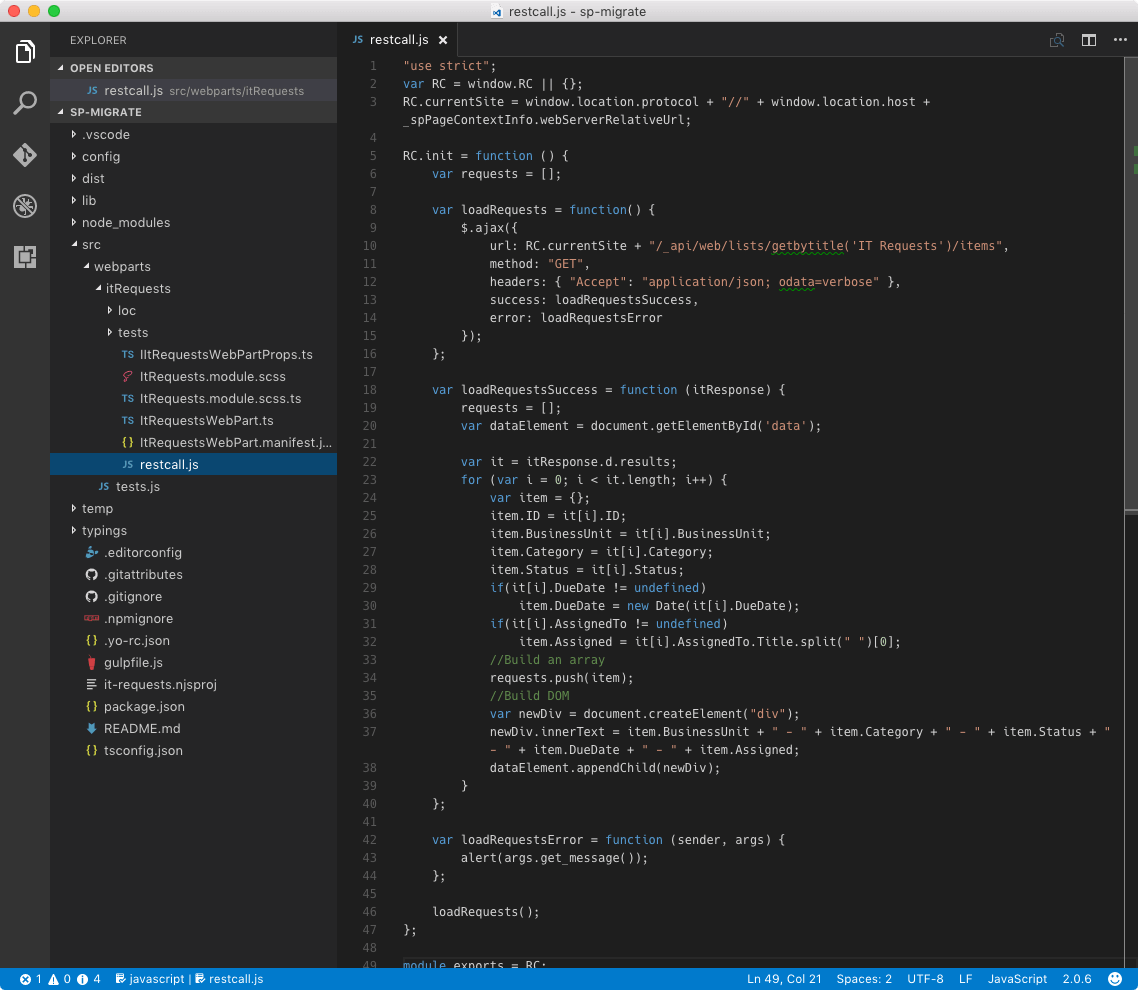
In Julie’s solution, the script contents are stored in a separate JavaScript file called restcall.js. Let’s download that file and add it to the web part folder in the SharePoint Framework project.
Reference the existing script file in the web part
The last part left, is to add the contents, that would previously go into the Script Editor Web Part, to the client-side web part.
In the code editor open the ./src/webparts/itRequests/ItRequestsWebPart.ts file. Below the last importstatement, and just before the web part class definition add:
import 'jquery';
This will cause the web part to load jQuery from the URL you specified in the ./config/config.json file.
Next, change the render method to:
export default class ItRequestsWebPart extends BaseClientSideWebPart<IItRequestsWebPartProps> {
  // ...
  public render(): void {
    this.domElement.innerHTML = `
      <div class="${styles.itRequests}">
        <div id="data">
        </div>
      </div>`;

    require('./restcall');
  }
  // ...
}
In the domElement you add the div where the retrieved data will be displayed. While it’s not required to keep the outside div, it’s a good practice to do so. It will make it easier for you to style the contents of the web part without colliding with other elements on the page.
The last part is to load the existing restcall.js file. Notice, how you don’t need to specify the .js extension – SharePoint Framework does that automatically for you.
If you run the project at this point, you will see that your SharePoint Framework client-side web part is already working as expected, without changing a single line of code in the existing solution!
Allow configuration through web part properties
While you migrated the existing customization to SharePoint Framework, without any code changes, at this point it doesn’t use any of the web part capabilities. For instance, the name of the list from which the web part should retrieve the data is not configurable.
Let’s have a look at the minimal set of changes required, to be able to configure the customization, without completely rewriting it.
Add a property to configure the list with data
Let’s start by adding a new web part property that users will use to specify the title of the list from which the customization should retrieve the data.
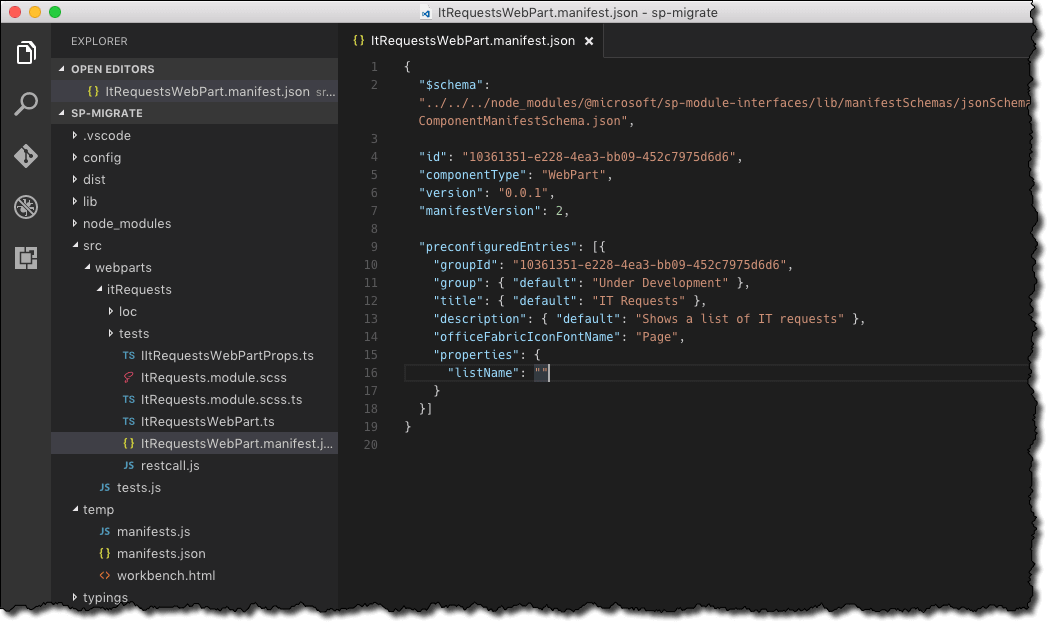
In the ./src/webparts/itRequests/ItRequestsWebPart.manifest.json file replace the default descriptionproperty with a property called listName and change its default value to an empty string.
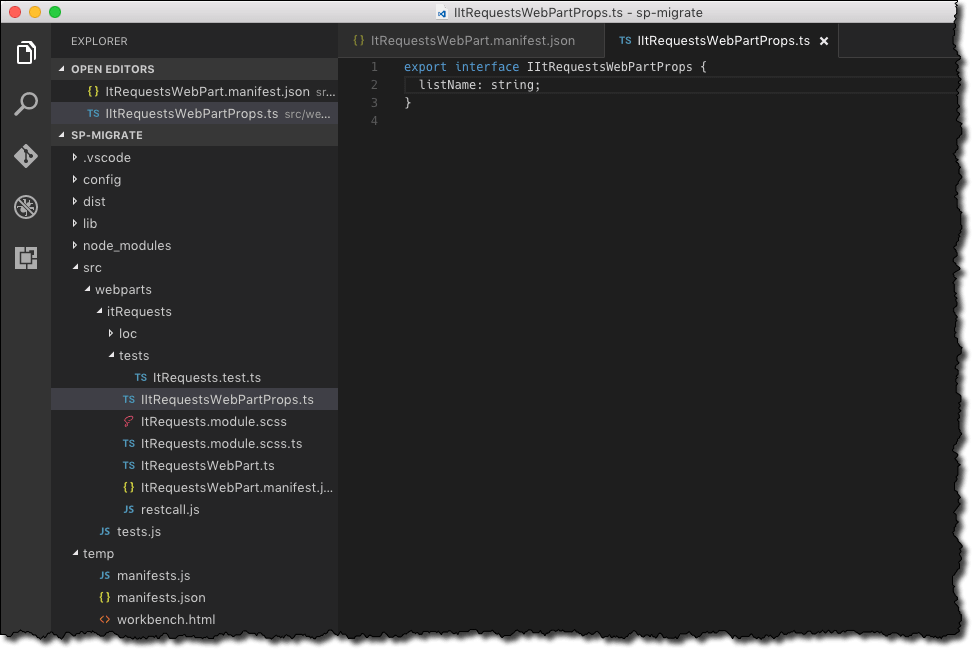
In the ./src/webparts/itRequests/IItRequestsWebPartProps.ts file change the existing descriptionproperty to listName.
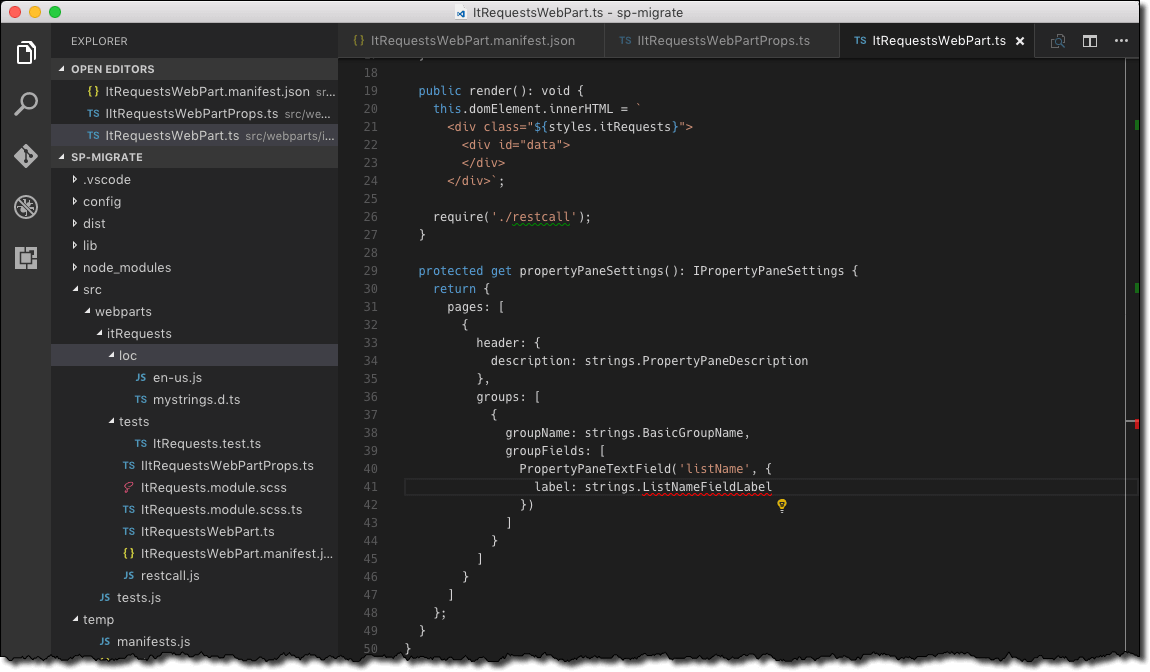
In the ./src/webparts/itRequests/ItRequestsWebPart.ts file, in the propertyPaneSettings method replace the default description property with listName and change the label accordingly.
Add the missing label by changing the contents of the ./src/webparts/itRequests/loc/mystrings.d.ts file to:
declare interface IItRequestsStrings {
  PropertyPaneDescription: string;
  BasicGroupName: string;
  ListNameFieldLabel: string;
}

declare module 'itRequestsStrings' {
  const strings: IItRequestsStrings;
  export = strings;
}
and the ./src/webparts/itRequests/loc/en-us.js to:
define([], function() {
  return {
    "PropertyPaneDescription": "Description",
    "BasicGroupName": "Group Name",
    "ListNameFieldLabel": "List name"
  }
});
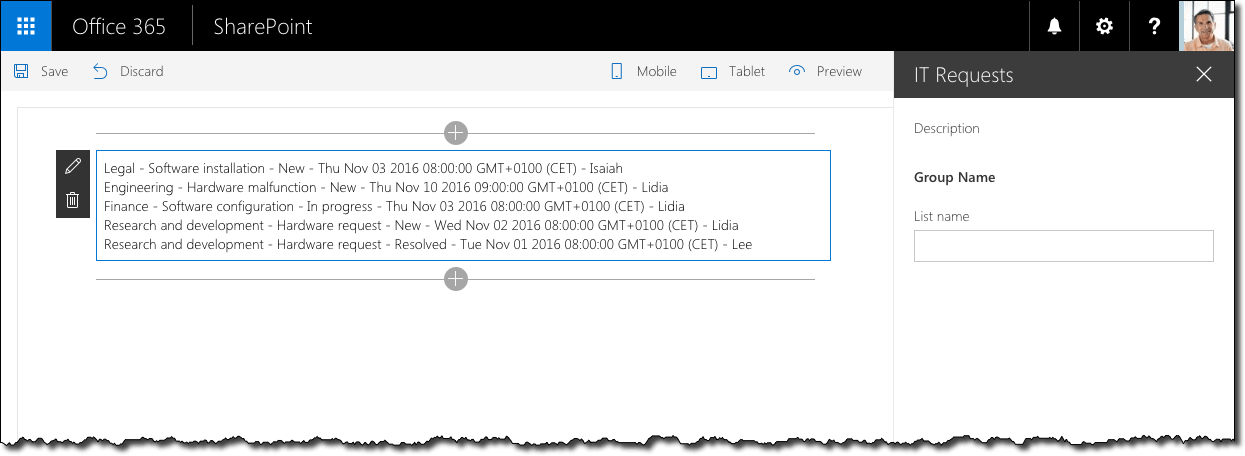
If you edit the web part, you should see the newly added property to specify the name of the list.
 Next, you will change the existing script to load the data from the list specified in the web part properties.
Convert the existing script to a module
External script files referenced by a web part are wrapped in a function. This ensures that the different scripts on a page won’t conflict with each other, even if the developer didn’t take care of it himself. As a consequence, none of the variables defined in such script are available to the web part referencing the file. To expose specific pieces of the script you have to assign them to the module.exports property. This property might seem like magic, given that it’s not defined anywhere in your script or the web part. In fact this property is defined by Webpack which SharePoint Framework uses for generating the web part file in the project build process.
Originally the customization would call the init function with a fixed list name from inside of the referenced script. To use the list name configured in the web part properties instead, you have to expose the RC object to the web part and call the init function from there passing the configured list title as a parameter.
In the restcall.js file change the signature of the init function to accept the name of the list as a parameter. In the AJAX call use that name instead of the hardcoded value. At the end of the script replace the RC.init();call with module.exports = RC; to expose the RC object to the web part.
"use strict";
var RC = window.RC || {};
RC.currentSite = window.location.protocol + "//" + window.location.host + _spPageContextInfo.webServerRelativeUrl;

RC.init = function (listName) {
    var requests = [];

    var loadRequests = function() {
        $.ajax({
            url: RC.currentSite + "/_api/web/lists/getbytitle('" + listName + "')/items?$select=ID,BusinessUnit,Category,Status,DueDate,AssignedTo/Title&$expand=AssignedTo/Title",
            method: "GET",
            headers: { "Accept": "application/json; odata=verbose" },
            success: loadRequestsSuccess,
            error: loadRequestsError
        });
    };

    // omitted for brevity
};

module.exports = RC;
Call the init function
In the ./src/webparts/itRequests/ItRequestsWebPart.ts file, change the contents of the render method to:
export default class ItRequestsWebPart extends BaseClientSideWebPart<IItRequestsWebPartProps> {
  // ...
  public render(): void {
    this.domElement.innerHTML = `
      <div class="${styles.itRequests}">
        <div id="data">
        </div>
      </div>`;

    const RC = require('./restcall');
    if (this.properties.listName) {
      RC.init(this.properties.listName);
    }
  }
  // ...
}
Instead of just loading the restcall.js file, you now get a reference to the RC object exposed using the module.exports property. Next, if the list name has been specified in the web part properties, you call the initfunction passing the name of the list as a parameter.
Change the web part property pane to non-reactive
By default SharePoint Framework client-side web parts use reactive property pane: every time you change one of the properties, web part’s render method is called to refresh the web part. Every keystroke in the property pane is considered a change and if users are typing the name of the list, your web part would execute an AJAX request after each keystroke causing a lot of errors along the way.
A simple way to prevent this from happening, is to change the web part property pane to non-reactive. In this mode, the changes are applied only after the user clicks the Apply button.

Using the non-reactive property pane is recommended whenever one or more web part properties affect how the web part loads its data.
Use SharePoint Framework HTTP client for AJAX calls instead of jQuery
In her solution, Julie uses jQuery to perform AJAX calls in a simple and cross-browser compatible way. SharePoint Framework provides us with the HTTP Client designed specifically to support calls to SharePoint REST APIs. By using the standard HTTP Client, you would not need to load jQuery anymore what would make the page with your web part load faster.
Remove jQuery
In the code editor open the ./config/config.json file and from the externals section remove the reference to jQuery.
In the ./src/webparts/itRequests/ItRequestsWebPart.ts file remove the import 'jquery'; statement.
Remove loading the data from the existing script
The standard SharePoint Framework HTTP Client is available inside the web part but not in the existing script file. The easiest way to combine the HTTP Client with the existing script is to load the data in the web part and pass it to the existing script for further processing and rendering.
From the restcall.js file remove the loadRequests function and related resources. Additionally, change the signature of the init function to accept the data and to call the loadRequestsSuccess function to process and display the data.
One important detail to keep in mind is that the data returned by the standard HTTP Client is in a slightly different format than how it’s returned by jQuery. Where with jQuery the data is stored in the itResponse.d.results property, in the object returned by the standard HTTP Client the data is accessible through the itResponse.value property.
"use strict";
var RC = window.RC || {};
RC.init = function (data) {
    var requests = [];

    var loadRequestsSuccess = function (itResponse) {
        requests = [];
        var dataElement = document.getElementById('data');

        var it = itResponse.value;
        for (var i = 0; i < it.length; i++) {
            // omitted for brevity
        }
    };

    var loadRequestsError = function (sender, args) {
        alert(args.get_message());
    };

    loadRequestsSuccess(data);
};

module.exports = RC;
Load data inside the web part
The final piece left is to load the data in the web part and pass it to the RC.init function.
In the ./src/webparts/itRequests/ItRequestsWebPart.ts file add a new method called loadRequests.
export default class ItRequestsWebPart extends BaseClientSideWebPart<IItRequestsWebPartProps> {
  // ...
  private loadRequests() {
    return this.context.httpClient.get(this.context.pageContext.web.absoluteUrl + "/_api/web/lists/getbytitle('" + this.properties.listName + "')/items?$select=ID,BusinessUnit,Category,Status,DueDate,AssignedTo/Title&$expand=AssignedTo/Title");
  }
  // ...
}
This method contains the equivalent of the jQuery AJAX calls but then using the standard SharePoint Framework HTTP Client. The URL of the current site is retrieved from the context object available inside the web part.
Notice, that even though the web part class is built using TypeScript you can use very little of it when migrating your existing customizations. As you’re migrating your customizations you can gradually change your existing JavaScript code to TypeScript and benefit of its typesafety features.
Next, change the render method to load the data using the newly added loadRequest method.
export default class ItRequestsWebPart extends BaseClientSideWebPart<IItRequestsWebPartProps> {
  // ...
  public render(): void {
    this.domElement.innerHTML = `
      <div class="${styles.itRequests}">
        <div id="data">
        </div>
      </div>`;

    const RC = require('./restcall');
    if (this.properties.listName) {
      this.loadRequests()
        .then((response) => {
          return response.json();
        })
        .then((data) => {
          RC.init(data);
        }, (error) => {
          alert(error);
        });
    }
  }
  // ...
}
By default the HTTP Client returns a raw response. In order to get the JSON data, you have to call the response.json() method which returns a Promise with the actual data. Once the JSON data is retrieved it can be passed for further processing and rendering to the RC.init() function.
All-in: move to TypeScript
The next logical step at this point would be to move the customization to TypeScript to fully benefit of its typesafety features. It involves the most effort but offers the most benefit in the long run.
Given the simplicity of the customization you could add a new method for processing and rendering data to the web part class. For larger or more complex customizations you might want to separate the different pieces to make them easier to maintain.
In the code editor change the ./src/webparts/itRequests/ItRequestsWebPart.ts file to:
import {
  BaseClientSideWebPart,
  IPropertyPaneSettings,
  IWebPartContext,
  PropertyPaneTextField
} from '@microsoft/sp-client-preview';

import styles from './ItRequests.module.scss';
import * as strings from 'itRequestsStrings';
import { IItRequestsWebPartProps } from './IItRequestsWebPartProps';

interface IRequestItem {
  ID: number;
  BusinessUnit: string;
  Category: string;
  Status: string;
  DueDate: string;
  AssignedTo: {
    Title: string;
  };
}

interface IRequest {
  id: number;
  businessUnit: string;
  category: string;
  status: string;
  dueDate?: Date;
  assigned?: string;
}

export default class ItRequestsWebPart extends BaseClientSideWebPart<IItRequestsWebPartProps> {

  public constructor(context: IWebPartContext) {
    super(context);
  }

  public render(): void {
    this.domElement.innerHTML = `
      <div class="${styles.itRequests}">
        <div class="data">
        </div>
      </div>`;

    if (this.properties.listName) {
      this.loadRequests()
        .then((response: Response): Promise<{ value: IRequestItem[] }> => {
          return response.json();
        })
        .then((data: { value: IRequestItem[] }): void => {
          this.renderRequests(data.value);
        }, (error: any): void => {
          alert(error);
        });
    }
  }

  private loadRequests(): Promise<Response> {
    return this.context.httpClient.get(this.context.pageContext.web.absoluteUrl + `/_api/web/lists/getbytitle('${this.properties.listName}')/items?$select=ID,BusinessUnit,Category,Status,DueDate,AssignedTo/Title&$expand=AssignedTo/Title`);
  }

  private renderRequests(requests: IRequestItem[]): void {
    const dataElement: Element = this.domElement.querySelector('.data');

    for (let i: number = 0; i < requests.length; i++) {
      const item: IRequestItem = requests[i];
      const request: IRequest = {
        id: item.ID,
        businessUnit: item.BusinessUnit,
        category: item.Category,
        status: item.Status
      };
      if (item.DueDate !== undefined) {
        request.dueDate = new Date(item.DueDate);
      }
      if (item.AssignedTo !== undefined) {
        request.assigned = item.AssignedTo.Title.split(' ')[0];
      }
      const newDiv: Element = document.createElement('div');
      newDiv.innerHTML = `${request.businessUnit} - ${request.category} - ${request.status} - ${request.dueDate} - ${request.assigned}`;
      dataElement.appendChild(newDiv);
    }
  }

  protected get propertyPaneSettings(): IPropertyPaneSettings {
    return {
      pages: [
        {
          header: {
            description: strings.PropertyPaneDescription
          },
          groups: [
            {
              groupName: strings.BasicGroupName,
              groupFields: [
                PropertyPaneTextField('listName', {
                  label: strings.ListNameFieldLabel
                })
              ]
            }
          ]
        }
      ]
    };
  }

  protected get disableReactivePropertyChanges(): boolean {
    return true;
  }
}
First of all, at the top, you can notice two interfaces: IRequestItem and IRequest. These represent respectively the structure of a list item retrieved from SharePoint and the data item rendered in the customization.
Looking further down you can see the renderRequests method moved from the original script file into the web part and which is responsible for rendering the IT requests in the web part.
Notice how all variables, constants and functions are decorated with types. It might seem excessive comparing to the original code, but it adds clarity to the code and in the long run makes it easier for other developers, or even yourself, to work with the code.
Further thoughts
The solution published by Julie is simplistic but it’s a very good illustration of frequently used patterns in client-side SharePoint customizations. When migrating the customization to the SharePoint Framework you could extend it further with communicating the configuration state, progress of loading the data and error handling and reporting. Also, instead of manually building DOM elements to display the data in the web part you could use a lightweight templating framework such as Handlebars.
Summary
Many SharePoint customizations use jQuery to communicate with SharePoint and show the results on the page. There are a number of ways in which you can migrate existing client-side customizations to SharePoint Framework that vary from reusing existing scripts to completely rewriting the customization to make the best use of the framework. SharePoint Framework is flexible enough to support all of them and you don’t have to completely rewrite your customizations to benefit of it.
Analyze SharePoint Framework solutions with SPCAF
Rencore’s SPCAF is the only solution on the market that analyzes and assures your SharePoint code quality. You can Check violations against a growing number of SPFx rule-sets regarding security, performance, best practices, maintainability, and supportability.