
Recently Microsoft announced the public CDN capability on Office 365. See how to use it to host your SharePoint Framework client-side web parts.
Inside is outside
SharePoint Framework is a new model for building SharePoint customizations. In contrary to other SharePoint development models available to date, SharePoint Framework encourages us to host customizations outside of SharePoint. Consisting fully of client-side assets these customizations can be hosted on public CDNs or other locations optimized for delivery of static resources. But hosting resources externally isn’t without downsides. Assuming you’re not hosting your organization’s customizations publicly, it adds yet another location for you to monitor and maintain.
Outside is inside
Recently Microsoft announced the public CDN capability on Office 365. Comparing to other CDN offerings, the Office 365 capability allows you to have files stored in your Office 365 sites publicly available through a CDN. Publishing a file to your Office 365-based CDN is as simple as uploading it to a designated document library. Using a specifically-crafted URL you can almost instantaneously access the files you uploaded delivered to you through the CDN.
You should keep in mind, that when you enable the CDN capability on a document library or a folder, its contents become publicly available. If someone on the Internet finds out the name of files stored in your CDN libraries they will be able to download them without authenticating. Ideally, only a specific group of users in your organization should have permissions to upload files to a CDN-enabled document library or folder.
The Office 365 public CDN capability is useful for delivering static assets quickly to your users, but did you know that you can also use it for hosting SharePoint Framework client-side web parts? Here is how.
Publish SharePoint Framework client-side web parts to Office 365 public CDN
Configure document library as CDN
Start with configuring a document library or a folder in your Office 365 tenant as a CDN location. Follow the detailed steps from the official announcement to complete the configuration. Don’t forget to verify that the configuration works correctly and your files can be accessed using the CDN URL.
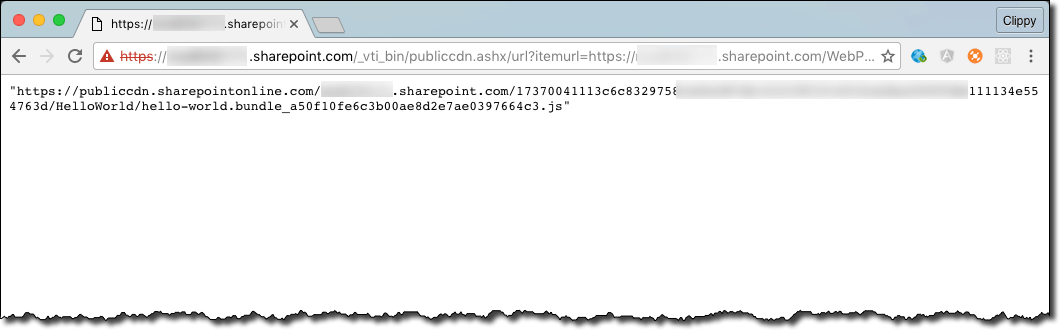
Store the public CDN URL for future reference. You will need it to configure the CDN location in your SharePoint Framework project later on.
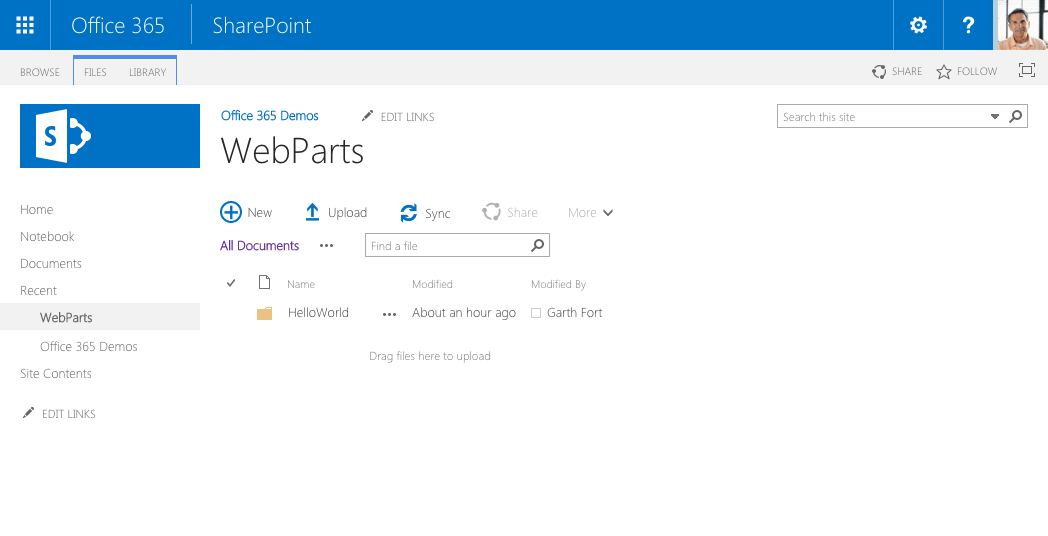
Create web part folder
In the CDN document library, create a folder where you will upload web part files. Because a web part consists of multiple files, storing them in a separate folder will help you keep all web part files together. Additionally, you might want to grant permissions to manage the code of different web parts to different departments in your organization.
Update the web part CDN URL
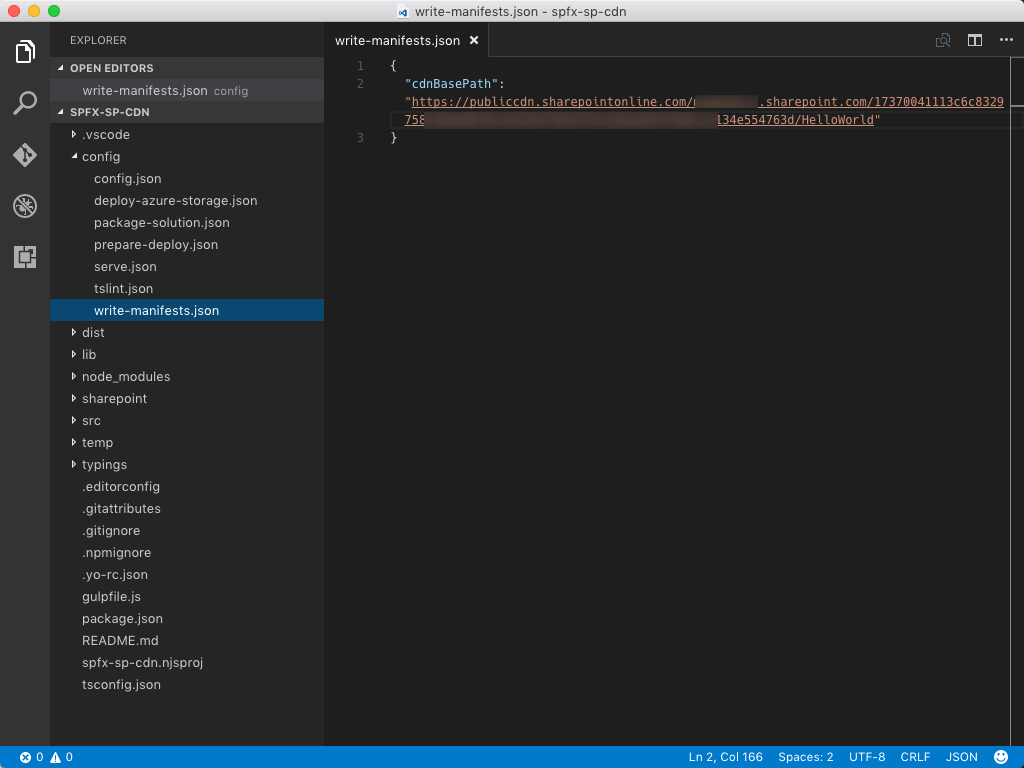
Before you can upload web part files to the newly created CDN folder, you have to configure the CDN URL in your SharePoint Framework project. To do this, open your SharePoint Framework project in the code editor. Then, open the ./config/write-manifests.json file and in the cdnBasePath property set the public CDN URL of the newly CDN folder.
Build and package SharePoint Framework project
The next step is to build and package your SharePoint Framework project to make it ready for publishing.
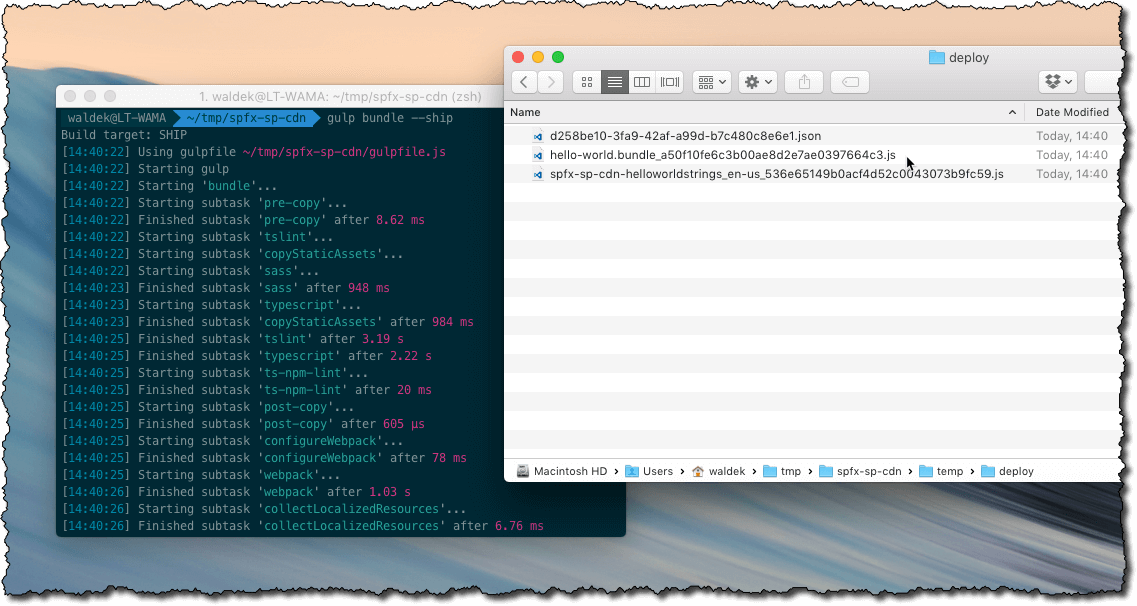
First, in the command line execute the
gulp bundle --ship
command. This will execute a release build of your project using the CDN URL specified in the write-manifests.json file. The output files of this command are located in the ./temp/deploy folder. These are the files that in a moment you will upload to the CDN folder in Office 365.
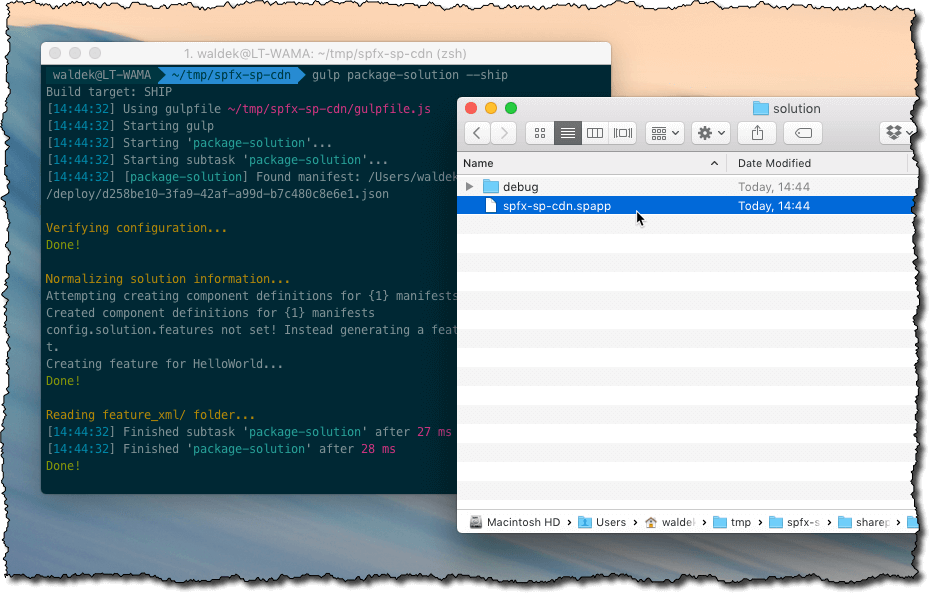
Next, in the command line, run the gulp package-solution –ship command to generate the .spapp file for your SharePoint Framework project. This file contains the information about the web parts in your project and where they are hosted. The generated .spapp file is located in the ./sharepoint/deploy folder.
Upload web part files to the web part CDN folder
Now that the project is built and packaged, it’s ready to be deployed. First you will deploy web part files, and then the .spapp file to register your web parts with SharePoint.
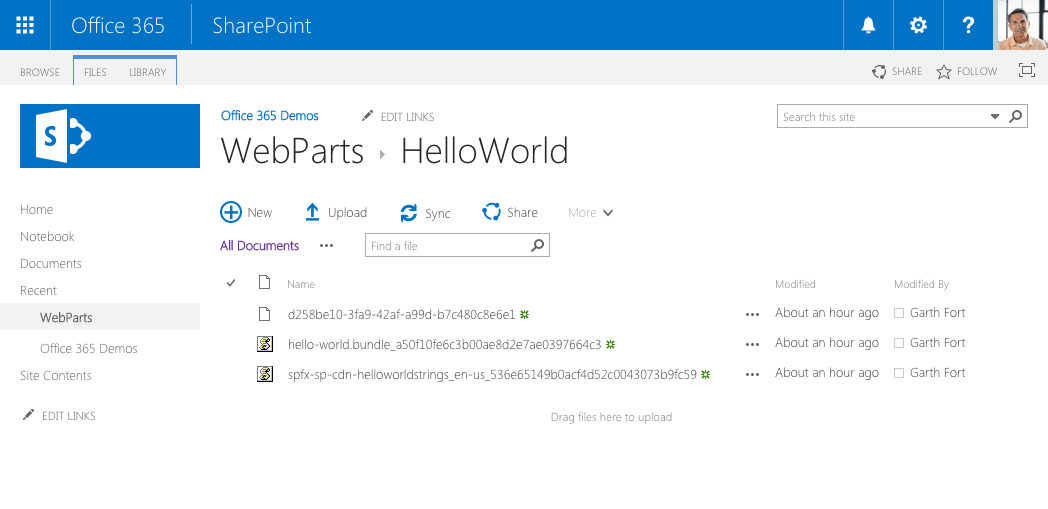
In your project go to the ./temp/deploy folder and upload all files to the web part folder in your CDN folder in SharePoint. You can either do this manually or automatically as a part of your build process using Wictor’s gulp-spsync plugin.
Publish the .spapp file to SharePoint app catalog
To be able to use your web parts in SharePoint, you have to register them with your SharePoint tenant. You do this, by deploying the .spapp file to the app catalog in your Office 365 tenant.
At this moment deploying .spapp files to app catalog is possible only in developer tenants. If you try to deploy it to a non-developer tenant, you will get an error stating that the .spapp file is not a valid app package.
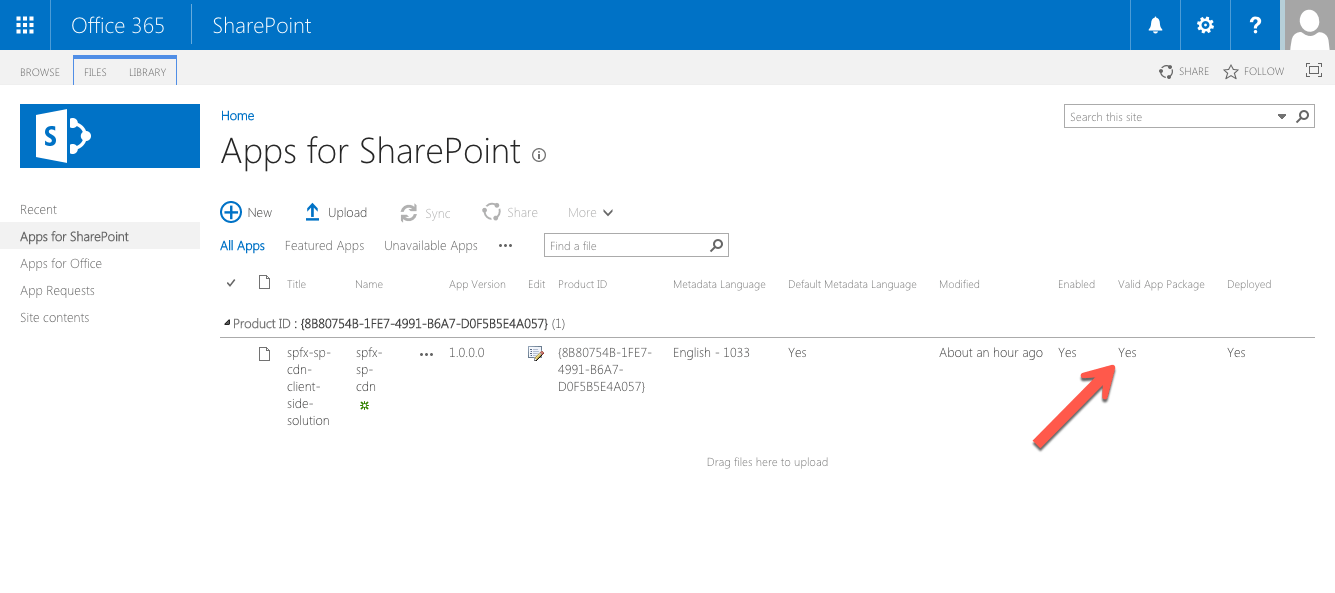
To deploy the .spapp file to your app catalog, open the app catalog site and from the menu navigate to the Apps for SharePoint page. Then, drag and drop the .spapp file onto the list of apps. After a moment you should see the .spapp file deployed in your app catalog.
Install the web parts app in a site
Having registered the .spapp file with web parts in SharePoint you can now start using them in your sites. Because SharePoint Framework web parts are distributed similarly to SharePoint add-ins, you first need to add the app to your site.
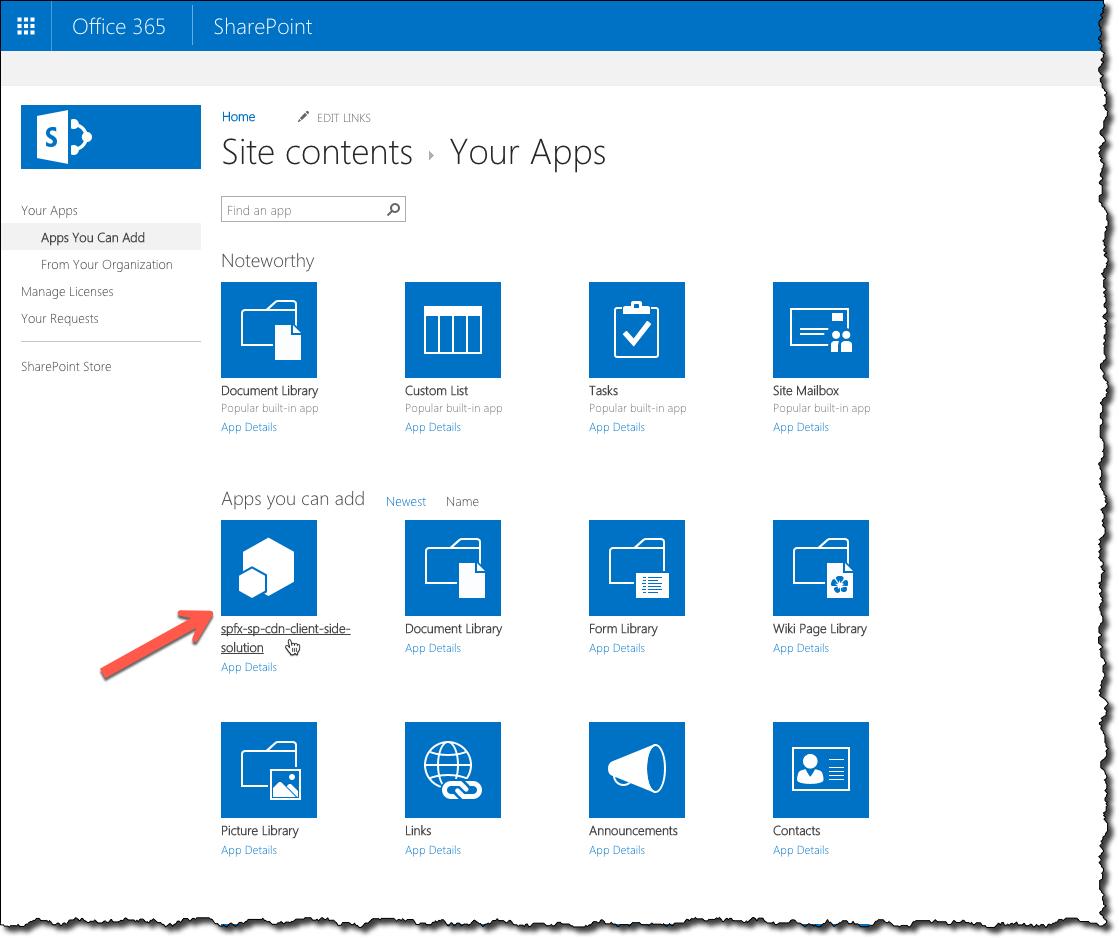
In your site navigate to the Site contents view and from the menu choose New > App option. The newly installed .spapp should be displayed as the first app in the list of apps you can add.
After adding the app you can now add your SharePoint Framework client-side web parts to pages the same way you would add any other web part in SharePoint. SharePoint Framework web parts are displayed in the Custom category in the web part gallery.
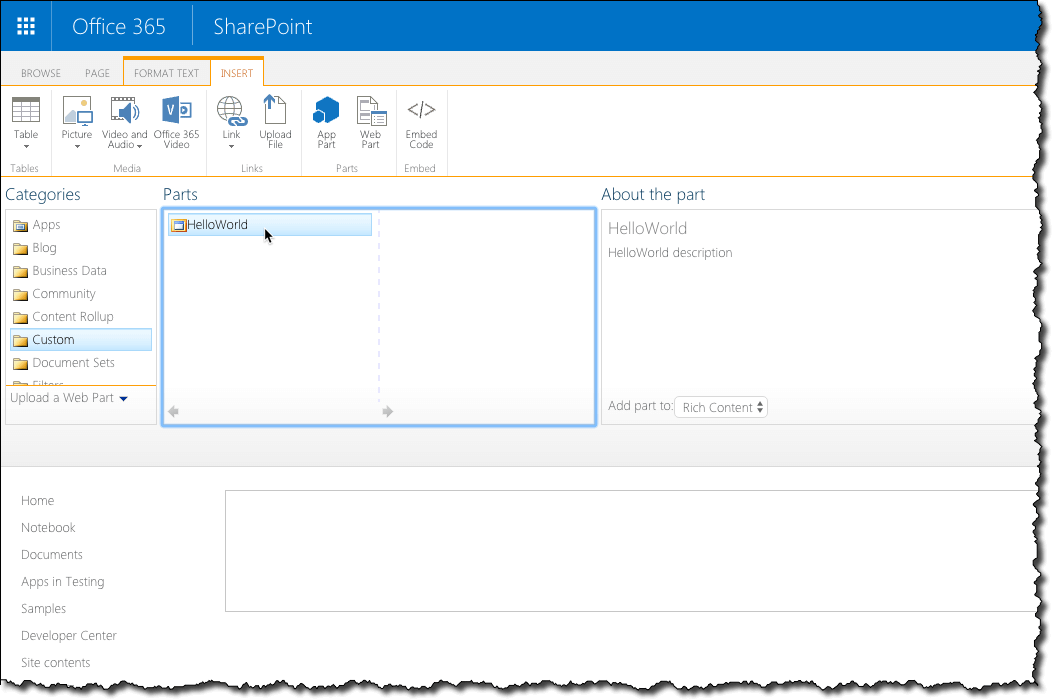
If you followed all steps correctly, you should see your SharePoint Framework client-side web part working correctly and being loaded from your Office 365 public CDN.

Summary
Recently Microsoft announced the Office 365 public CDN. Using this capability you can publish static files from your Office 365 tenant through a public CDN which allows you to optimize your portals for performance with little additional maintenance. You can also use the Office 365 public CDN to host SharePoint Framework client-side web parts for your organization.