This blog was originally posted on 22nd March 2016.
The Office 365 Developer Patterns and Practices PowerShell Cmdlets turn out to be lifesavers for many people. They easily allow you to create artifacts in your SharePoint sites, like lists, fields, etc. without needing to click around or write a complex C# application.
The PowerShell Cmdlets come in 2 versions: one for Office 365 and one for on-prem. The reason for this is that the CSOM SDK, which the cmdlets use behind the scenes, also come in two versions.
There are two installers available, but when you install them both, only one set of the cmdlets seem to be loaded when you open PowerShell. Why that is I will explain below.
Click the button below and learn how to put your PowerShell skills to use.
A bit of background
PowerShell has functionality to auto-load modules. It does this based upon a path environment variable and it will scan the folders in that variable to find the modules. The easiest way to see the environment variable is by opening PowerShell and then you enter:
$env:PSModulePath
The result will be a list of paths. In there, if you have the PnP PowerShell Cmdlets installed, you will see a reference to the installation location of the cmdlets. By default, that will be something alike
C:\Users\<username>\AppData\Local\Apps\OfficeDevPnP.PowerShell.V15.Commands
When you open PowerShell, it will scan that folder for modules and if its finds one it will load that module into memory. Now if you install both versions of the cmdlet, both will be added to the path, but as they have the same signature, only one of them will be loaded into memory. The modules will be loaded on-demand, so if you open PowerShell, they will not be there yet, but the moment you, for instance, use the Connect-SPOnline cmdlet it will load the module into memory.
To see all modules that are currently loaded and available, enter:
Get-Module
You’ll see something alike:

Notice that, although I installed both versions of the PowerShell Cmdlets, only one module has been loaded. In this case the V16 version, which is for SharePoint Online. The reason for this is the order of the paths in the PSModulePath environment variable. While both modules are in that path, the first one that matches the Connect-SPOnline cmdlet will be loaded.
Now, say that you have both an online Office 365 tenant and you have a local SharePoint server too, and you want to write a script that handles both?
Setup your environment
The first step is to install both versions of the PowerShell Cmdlets from https://github.com/officedev/pnp-powershell/releases
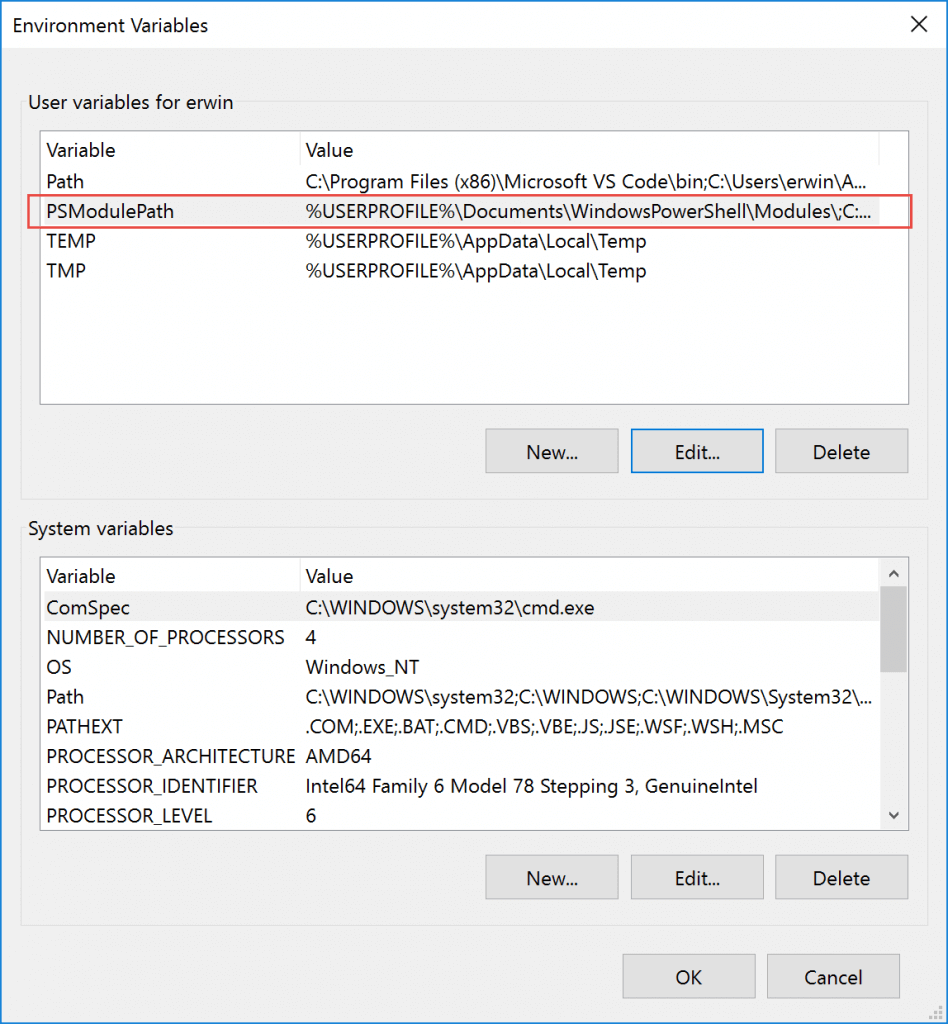
Then remove the paths from the PSModulePath environment variable. So remove all references to the PnP PowerShell modules. This will prevent PowerShell from auto loading the cmdlets. To modify the environments variables, just press the Windows key and start type “environment”. It will offer you an option to edit the environment variables:

Then in your script you can then manually load the PowerShell Cmdlets using (everything on one line):
Import-Module C:\users\<username>\AppData\Local\Apps\OfficeDevPnP.PowerShell.V15.Commands\Modules\OfficeDevPnP.PowerShell.V15.Commands\OfficeDevPnP.PowerShell.V15.Commands.dll
Replace V15 with V16 if you want to load the Office 365 version of the cmdlets. The path shown above is different if you install the cmdlets for all users. Then you will find the modules in
C:\Program Files (x86)\OfficeDevPnP.PowerShell.V15.Commands
Using the approach above it’s possible to write a single script that, depending on the environment you’re using, loads the correct cmdlet module.
The Rencore Platform
If you are using applications to extend and customize Microsoft SharePoint, you should check out the Rencore Platform. We offer application security, management, governance and compliance for each stage of the product life-cycle. Schedule a live product tour today!


