
Since my last post on Azure Analytics (thanks to everyone that shared) and now that it is summer and things are calming down a bit, I wanted to play around a little with all the new shiny stuff that is getting released by Microsoft around Office 365, Azure and SharePoint. Today I’m going to focus on creating an ‘office add-in’ for Word.
But first, is it Add-in or App?
‘Office add-in’, is the new name Microsoft is using for ‘Apps’ or ‘Apps for Office’. There is still a little confusion in the community about naming conventions, but only really because Microsoft has yet to update the documentation and apps. Jeremy Thake talks about the name change and the conventions to follow in his “Office 365 ‘App Model’ Rename Cheat Sheet”. Long story short, everything that was an app is now an add-in, though the app launcher in Office 365 remains unchanged. And I assume the file extensions for SharePoint add-ins will remain .app for the unforeseeable future.
I’ve used ‘add-in’ as much as I can in this blog. However, for those eagle-eyed readers parts of Visual Studio (even VS2015) still use the old names, so you will see these creep in time to time.
The purpose of this Word add-in
I’m going to show you how to use the Office 365 Unified API to create a Word add-in. A user can select an email address in their Word doc, hit a button and the add-in will pull back all the information Office 365 knows about that user. I’m using an email address as it is unique for each user.
What is Office 365 Unified API?
When creating add-ins for Office 365, a number of API’s are available to interact with the services in Office 365 – like e-mail, user information, documents, etc. This is because Office 365, below the surface consists of multiple systems like SharePoint, Exchange, Azure AD – so there are multiple endpoints. For those that want to know more check out the public preview released by Microsoft.
To authenticate against Office 365 I will use the core Azure AD Authentication Library for JavaScript, ADAL JS. This library makes it possible to authenticate against Office 365 / Azure AD using JavaScript only, and eliminates the need for a server-side component.
Set up an Office 365 environment
You will need an Office 365 environment. I use my developer tenant that comes with my MSDN subscription, but you can also create a demo tenant via http://microsoftofficedemos.com.
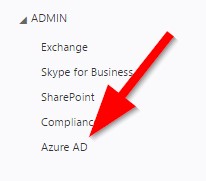
The next step is to create an application in Azure. If not already set up, you will need an Azure subscription. You can either get that also with your MSDN subscription (including free credit) or you can sign up for a trial. If the account you are using for Office 365 is the same as the account used for the Azure subscription, or if you want to set up Azure AD with the same account as Office 365, it is very easy. Go to Office 365 -> Admin -> Azure AD. Follow the instructions if you haven’t set up an Azure subscription yet.
In case your account for Office 365 is different from the account for Azure AD then you have to follow these steps to add the Demo Azure AD to your Azure subscription.
In both scenarios you should see the Office 365 Directory in Azure. Then open the Directory:
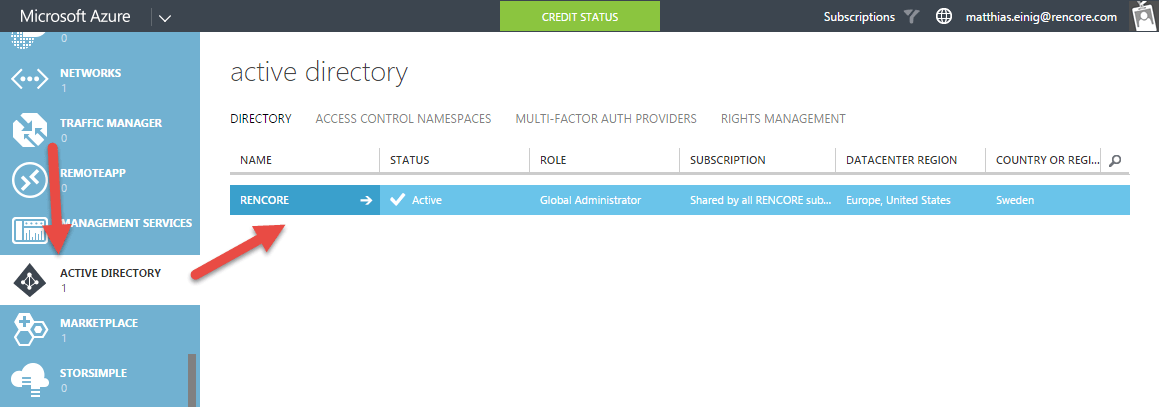
The next step is to add an Application. Click on the tab Applications.

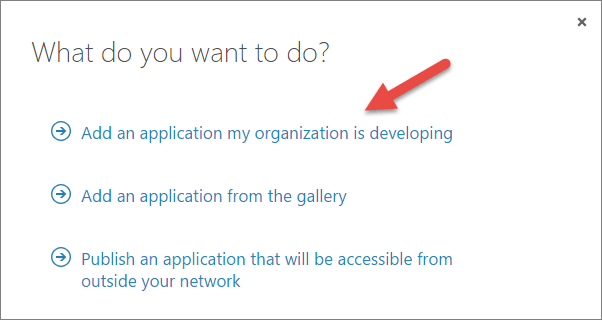
And then on “Add” in the footer.
Select “Add an application my organization is developing”
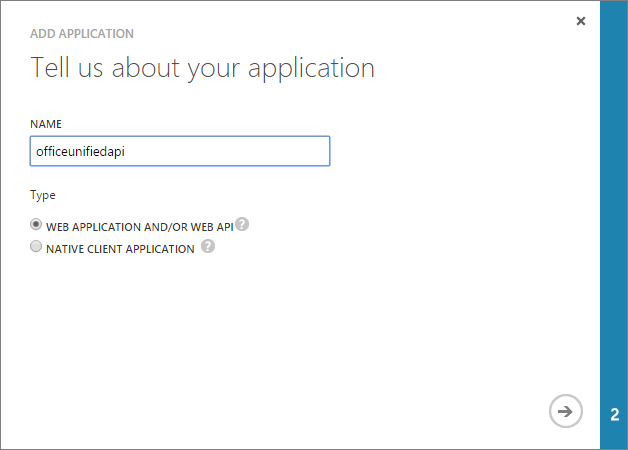
Enter a name and select “Web application and/or Web API”
On the next screen, enter:
- Sign-on URL: https://localhost:44307/App/Home/Home.html
- App ID URI: https://<tenantname>.sharepoint.com/officeunifiedapi, replace <tenantname> with the name of your Office365 tenant.
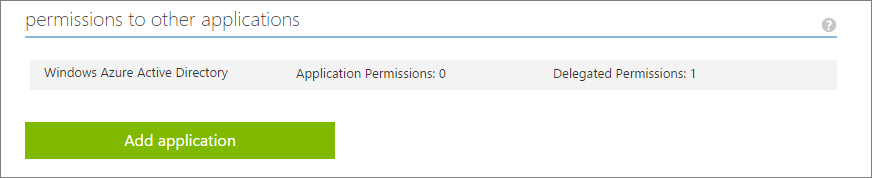
The new application will appear. Switch to “Configure”, scroll down to the bottom and click “Add Application” under “permissions to other applications” to allow the add-in to communicate with the Office 365 Unified API.
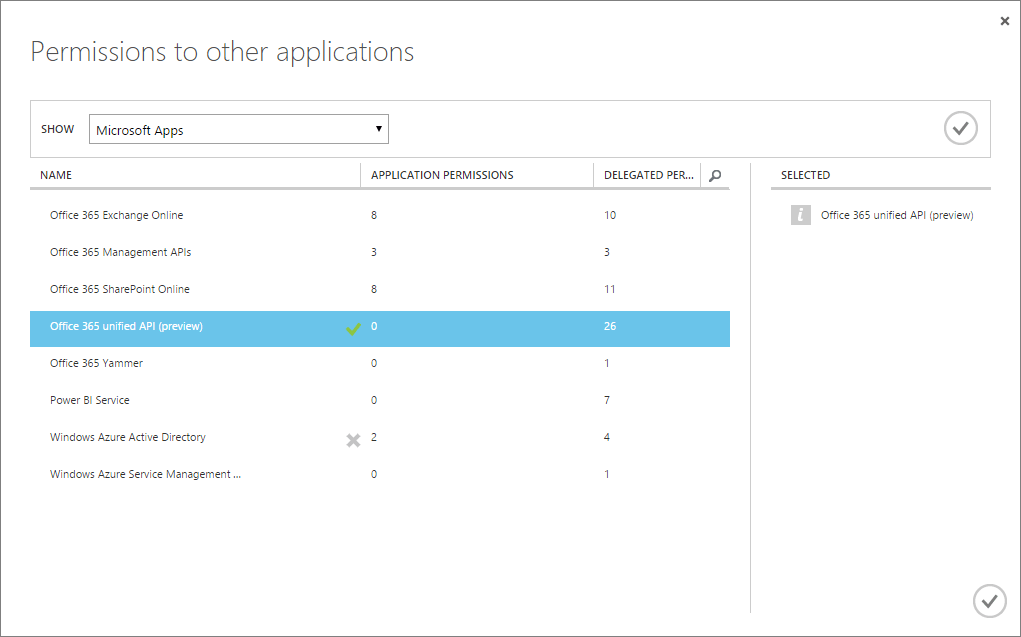
Select > Office 365 Unified API
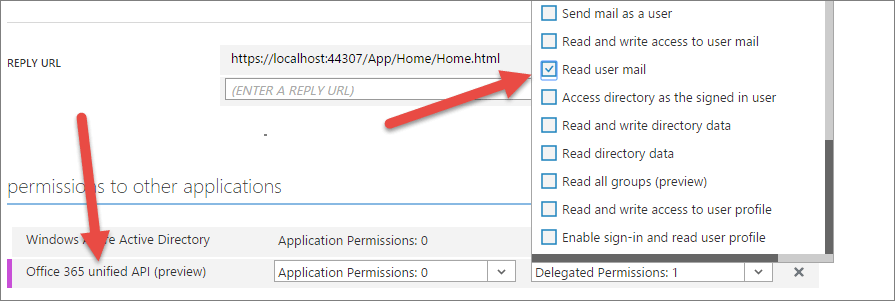
Click OK and then Delegated permissions => “Read user mail”
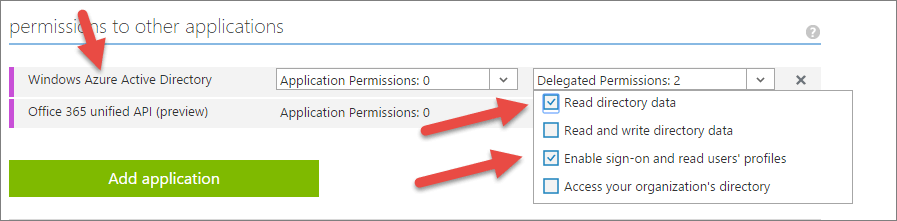
Select “Read directory data” and “Enable sign-on and read users’ profiles” for “Windows Azure Active Directory”.
Save the changes by hitting the “Save” button at the bottom.
The last step is to enable Implicit Flow in order to allow the Azure application to use the OAuth2 implicit grant. This cannot be done via the user interface, but must be done by changing the manifest.
- Click on Manage Manifest -> Download Manifest in the footer.
- Open the file in a text editor. Search for oauth2AllowImplicitFlow and set it to true
- Save the file, go back to the Azure Management Portal
- Click on Manage Manifest -> Upload Manifest. Upload the updated manifest file.
Create the Office Add-in
Now that we have finally set up everything, we can get started creating our Office add-in. To do that, you will need the Microsoft Office Developer Tools for Visual Studio 2013 or 2015 installed to continue.
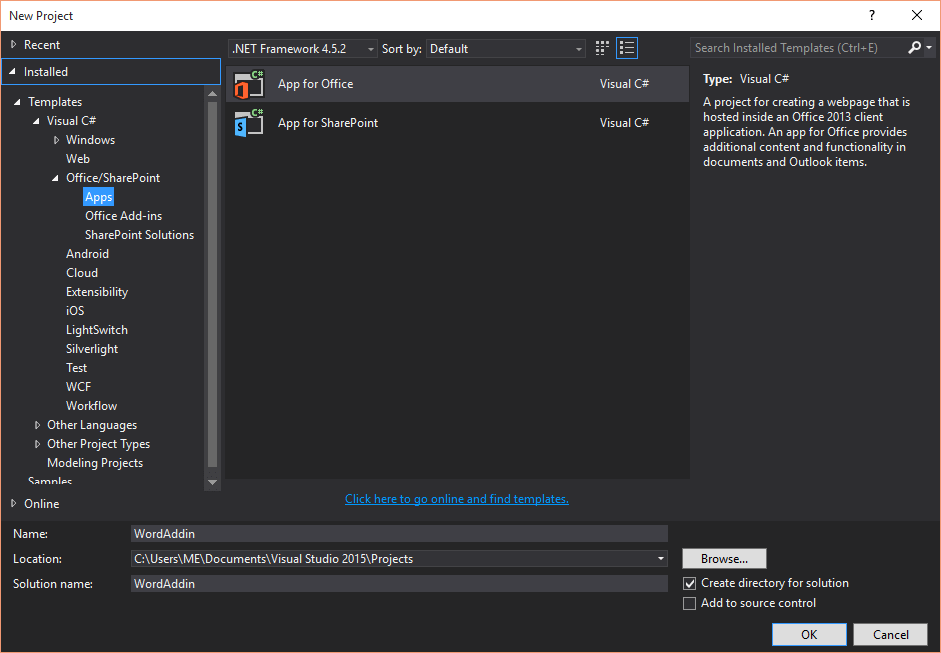
Open Visual Studio and create a new project via File -> New Project. Select Visual C# -> Office/SharePoint -> Apps -> App for Office (notice, this still hasn’t been renamed to Add-in in the recently released VS2015).
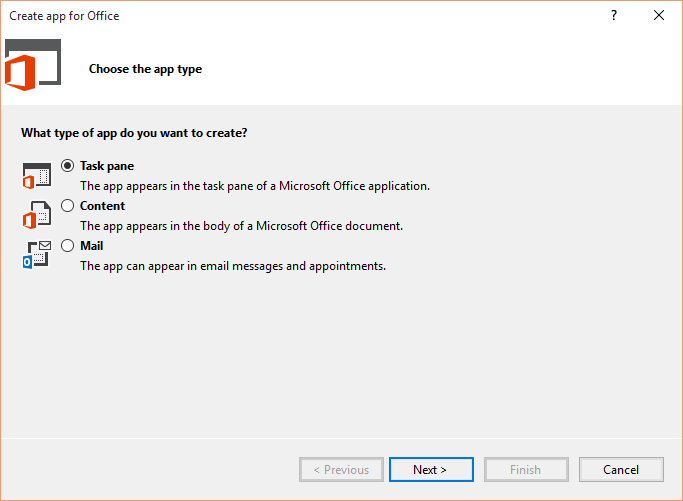
In the next screen you will have to select what kind of app you want to create. In my case I want a Task pane app.
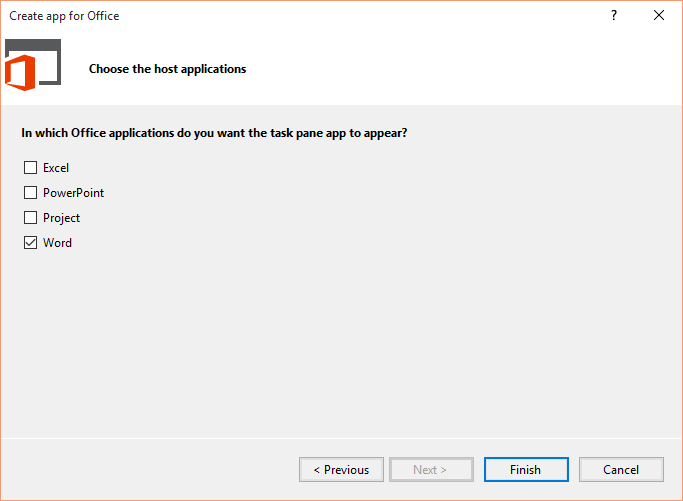
… and I only want to target Word.
The default content app will now appear. We need to do two things now: Authenticate against Azure AD via ADAL.JS, and secondly add the code to communicate with the Office 365 Unified API.
ADAL.JS
The Active Directory Authentication Library for JavaScript (ADAL.JS) allows apps to directly authenticate against Azure AD, without a server-side layer. Initially this was not possible, because of CORS (Cross-Origin resource sharing).
Many blog posts have been written how to implement ADAL JS in Single-Page Applications by using Angular, but it does not require Angular as I will show you.
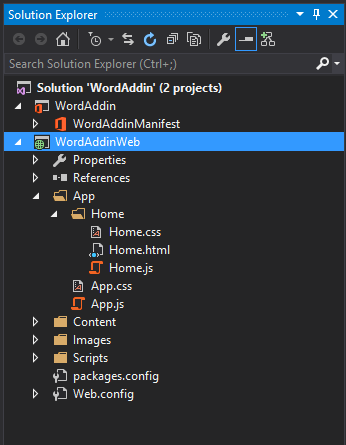
After creating your Office add-in you should see something like this:
Open App/Home/Home.html and add the following include to the <head> (after the jquery include, before the ../App.js include):
<script src="//secure.aadcdn.microsoftonline-p.com/lib/1.0.0/js/adal.min.js"></script>
Then replace the div with id “content-header” with:
<div id="content-header">
        <button href="javascript:;" class="btn-success app-logout">Logout</button>
        <button href="javascript:;" class="btn-success app-login">Login</button>
        <strong><span class='app-user navbar-text'></span></strong>
</div>
Add the following JavaScript to App/App.js at the top (outside the app method):
window.config = {
    tenant:'<tenant>.onmicrosoft.com',
    clientId: '<Azure App Client ID>',
    postLogoutRedirectUri: window.location.origin,
    endpoints: {
        officeGraph: 'https://graph.microsoft.com',
    },
    cacheLocation: 'localStorage'
};
And replace <tenant> with your tenant name and add your Azure Application Client ID, which you can retrieve from the configure page of your application in Azure.
By adding graph.microsoft.com as an additional endpoint, we will be able to get a token.
Then add the following JavaScript to App/App.js within the app.initialize method:
var authContext = new AuthenticationContext(config);

        var $userDisplay = $(".app-user");
        var $signInButton = $(".app-login");
        var $signOutButton = $(".app-logout");

        // Check For & Handle Redirect From AAD After Login
        var isCallback = authContext.isCallback(window.location.hash);
        authContext.handleWindowCallback();

        if (isCallback && !authContext.getLoginError()) {
            window.location = authContext._getItem(authContext.CONSTANTS.STORAGE.LOGIN_REQUEST);
        }

        // Check Login Status, Update UI
        var user = authContext.getCachedUser();
        if (user) {
            $userDisplay.html(user.userName);
            $userDisplay.show();
            $signInButton.hide();
            $signOutButton.show();
        } else {
            $userDisplay.empty();
            $userDisplay.hide();
            $signInButton.show();
            $signOutButton.hide();
        }

        // Register NavBar Click Handlers
        $signOutButton.click(function () {
            authContext.logOut();
        });
        $signInButton.click(function () {
            authContext.login();
        });
The code above is based on the example code in this GitHub repository.
We’re almost ready here, the last step is to tell the Office add-in that it should load the Office 365 login page within the app. By default it will open it in a browser window, which is not sending back the token to the app after logging in.
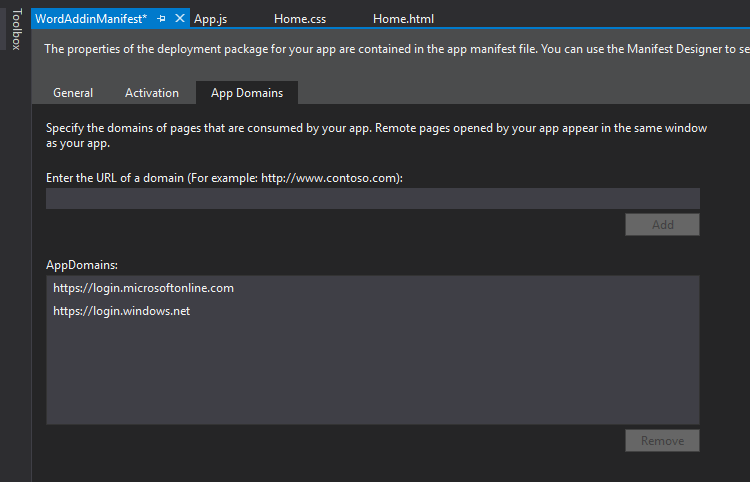
Open the WordAddin project (not the web project) -> WordAddinManifest and go to the App Domains tab. Add https://login.microsoftonline.com and https://login.windows.net
Test that it works by hitting F5 and try to login.
Visual Studio will ask you if you want to trust the self-signed localhost certificate. Click yes and then when asking to install the certificate click yes again.
In my case running the add-in initially did not work, I received an error “Sorry, but we’re having trouble signing you in. We have received a bad request.”. If it does the same for you, look at the error at the bottom. In my case the app was running on a different port. “AADSTS50011: The reply address ‘https://localhost:44307/App/Home/Home.html’ does not match the reply addresses configured for the application”
You can solve this by changing the debug port, or by modifying the sign-in and the reply URL to the Azure Application to match the port in the error message.
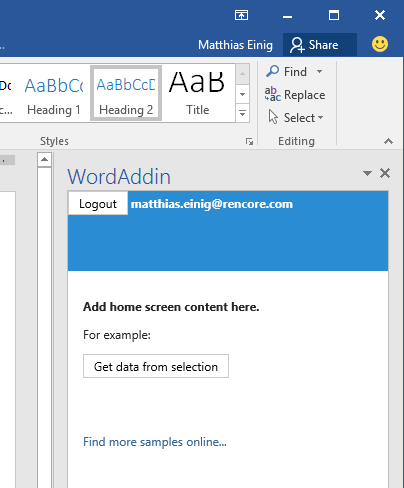
When logged in successful, you should see something like this (of course showing your account 😉 ):
Communicate with the Office 365 Unified API
The foundation has been set, we are now able to utilise the Office 365 Unified API. As I said I will use the /users endpoint to find a user, based on their email address, and return their information from Office 365. This could have quite practical applications. Imagine you are working on a document in Word, it might be something shared with multiple users around an office or multiple teams around the world. You can highlight an email address in the doc and get that person’s profile information back. You could then quickly paste in their full details, like office phone number or location.
As I touched on earlier you could also expand this example to search on a user’s name, but we are using email here as a proof of concept.
Change the html in App/Home/Home.html as follows. Replace the contents of content-main with:
<div id="content-main">
        <div class="padding">
            <button id="get-data-from-selection">Get data from selection</button>

            <div id="results"></div>
        </div>
    </div>
Then change App/Home/Home.js to:
/// <reference path="../App.js" />
(function () {
    "use strict";
    // The initialize function must be run each time a new page is loaded
    Office.initialize = function (reason) {
        $(document).ready(function () {
            app.initialize();
            $('#get-data-from-selection').click(getDataFromSelection);
        });
    };
  // Reads email address from current document selection and displays user information
    function getDataFromSelection() {
        var baseEndpoint = 'https://graph.microsoft.com';
        var authContext = new AuthenticationContext(config);

        Office.context.document.getSelectedDataAsync(Office.CoercionType.Text,
            function (result) {
                if (result.status === Office.AsyncResultStatus.Succeeded) {
                    authContext.acquireToken(baseEndpoint, function (error, token) {
                        if (error || !token) {
                            app.showNotification("No token: " + error);
                        }
                        var email = result.value;
                        var url = "https://graph.microsoft.com/beta/" + config.tenant + "/users/" + email;
                        var html = "<ul>";
                        $.ajax({
                            beforeSend: function (request) {
                                request.setRequestHeader("Accept", "application/json");
                            },
                            type: "GET",
                            url: url,
                            dataType: "json",
                            headers: {
                                'Authorization': 'Bearer ' + token,
                            }
                        }).done(function (response) {
                            html += getPropertyHtml("Display name", response.displayName);
                            html += getPropertyHtml("Address", response.streetAddress);
                            html += getPropertyHtml("Postal code", response.postalCode);
                            html += getPropertyHtml("City", response.city);
                            html += getPropertyHtml("Country", response.country);
                            $("#results").html(html);
                        }).fail(function (response) {
                            app.showNotification(response.responseText);
                        });
                    });
                } else {
                    app.showNotification('Error:', result.error.message);
                }
            }
        );
    }
    function getPropertyHtml(key, value) {
        return "<li><strong>" + key + "</strong> : " + value + "</li>";
    }
})();
Run the add-in, login if necessary, and type some text with an email address of someone in your Office 365 tenant. Highlight it and click the button “Get data from selection”. The users’ details should show up:
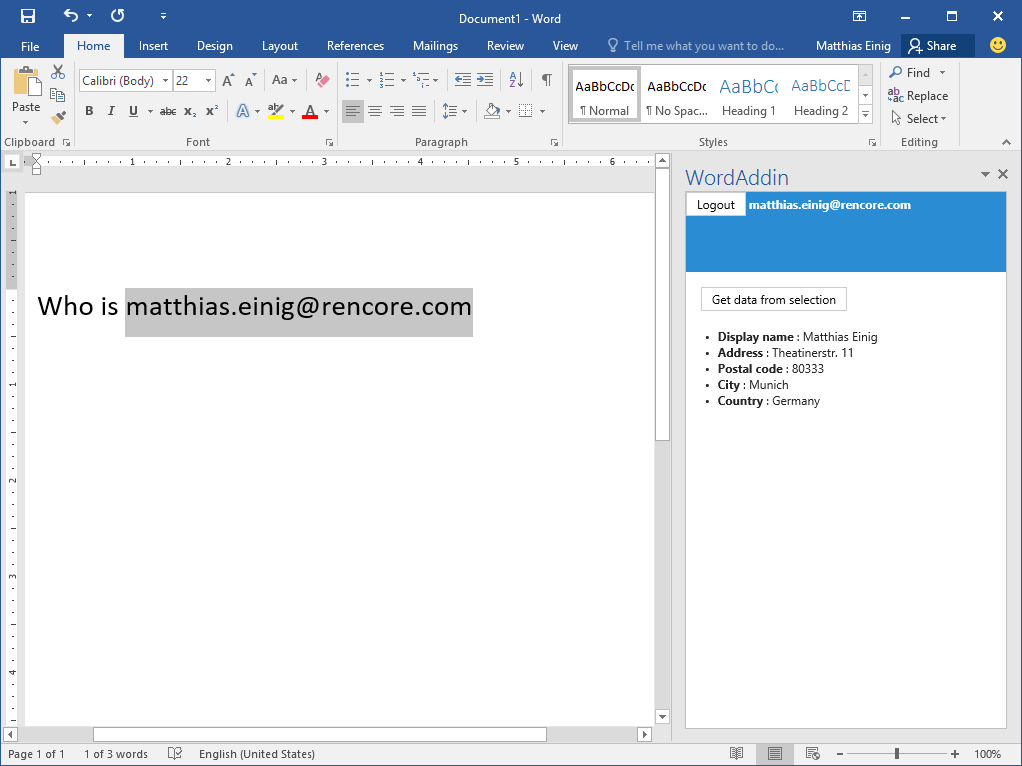
Hurray! 🙂 There is of course no error handling implemented yet, so selecting an invalid email address or nothing will cause an error. But the proof of concept is clear and can be easily extended if you like, now that everything is set up.
According to the API documentation, it is also possible to get the photo to come back as the thumbnailPhoto property, but it seems to be missing right now in my test. As the API is still in Preview, things don’t always work all of the time as expected. I’ll check back on this in the future.
You can download the sample application from my GitHub account.
One single endpoint
I have shown you how to create a single page Office add-in using ADAL JS and the new Office 365 Unified API. Eventually this single end point will probably replace the different endpoints currently available. Office 365 Unified API should make life a lot easier when building add-ins like this or larger solutions.
It’s definitely possible to expand and explore this sort of idea to allow my add-in to look up data based on a simple name in a Word doc. An add-in could also search names (though this would need additional work), allow the current user to select the right one, and then pull back info based on that user. Maybe I will revisit this later! Other ideas are welcome!