
This blog post was published on 26th June, 2015
Are you looking for answers to questions like:
- How are people using my Intranet?
- How many people are visiting which pages?
- How long do they stay on each section?
Being able to track usage of a website or Intranet is not new, but a lot has changed over the years with the technology available and the insights possible. In the early days of the Intranet, the only data available was via a page counter. Then more detailed usage statistics came with tools like SharePoint 2003. Over time however these statistics have evolved, and changed their names from “Usage analytics” in SharePoint 2007 to “Web analytics” in SharePoint 2010. In SharePoint 2013 they have been replaced again by ‘Popularity Trends’. There is lots to like with these latest incarnations, but for many there are still missing features.
Click the button below and enjoy this Office 365 special from Matthias and Jeremy Thake .

Microsoft now has a brand new offering: Azure Application Insights, its answer to Google Analytics. It will work with any website, built in any language, hosted on any platform and offers a raft of interesting features. So I thought I’d take a look, walk you through how to setup it up, and show you a little of what is possible.
Setup and basic integration
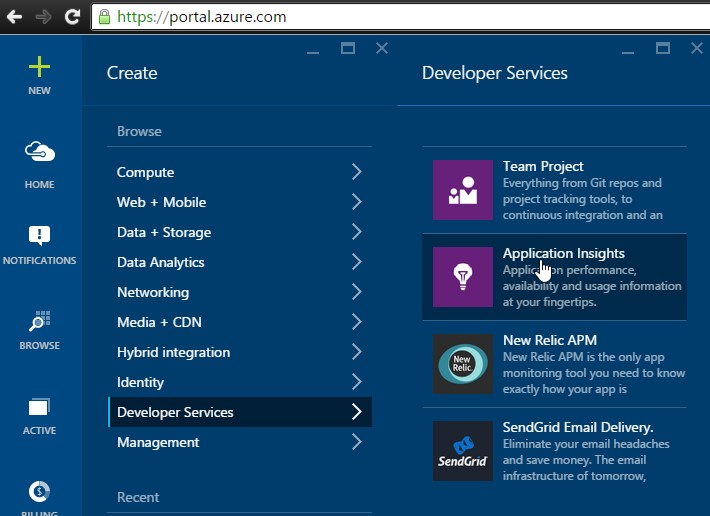
First of all, you will need to create a new Azure Application Insights application from the Azure Preview Portal. It’s not available in the current management portal:
- Go to https://portal.azure.com
- Click the + icon in the top-left corner
- Go to Developer Services -> Application Insights
Fill out the form as follows:
- Name: Enter a name for your application.
- Application Type: “ASP.NET Web Application”
- Resource group: Re-use an existing one, or create a new one.
- Subscription: It depends on your configuration, which subscription it should be billed to. It’s free up to a certain number of events, see here for the different plans available.
- Location: Currently only available from Central US, leave it like that.
After a few moments your application will be created. The next step is to extract the required JavaScript:
- Click on the application, on the Quick start button in the header
- Then “Get code to monitor my web pages”

Copy and paste this piece of JavaScript and save it for later. You’ll need it in a few steps…
Inject JavaScript into every page in Office 365
The next step is to inject this piece of JavaScript in every page in your Office 365 portal. The old way of doing this was by customizing the master page. Another solution would be to deploy a custom action using a sandboxed solution, but sandboxed solutions are also deprecated.
The new official way of doing this is by building a provider hosted app that will deploy a JavaScript file to the site and add it to every page by adding a custom action.
The Office Dev PnP contains two full working samples to do this:
- A provider-hosted app called EmbedJavascript
- A SharePoint-hosted app called EmbedJavascriptJsom.
As a SharePoint-hosted app does not require a provider to host the app, we are going to go with this option.
You will need Visual Studio 2013 and an Office 365 developer site to continue.
First of all, you’ll need to download the GitHub repository. The good thing is that Visual Studio 2013 supports GitHub:
- Go to Team -> Connect to Team Foundation Server
- In Server Explorer, click Clone under Local GitHub repositories.
- Enter the GitHub URL and your local folder, e.g. C:\Projects\PnP.
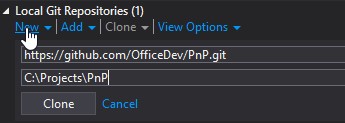
- Click Clone to download the repository.
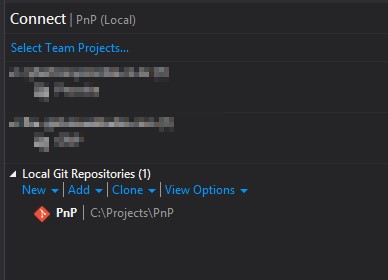
- The end result will be like this
- Hit the left-arrow in the Team Explorer
- Click Open under Solutions
- Browse to Samples -> Core.EmbedJavaScriptJSOM
- Open Core.EmbedJavaScriptJSOM.sln
- The next step is to enter the URL to your Office 365 developer site.
- Left-click on the project and open the properties panel.
- Under Site URL enter the address of your developer site.
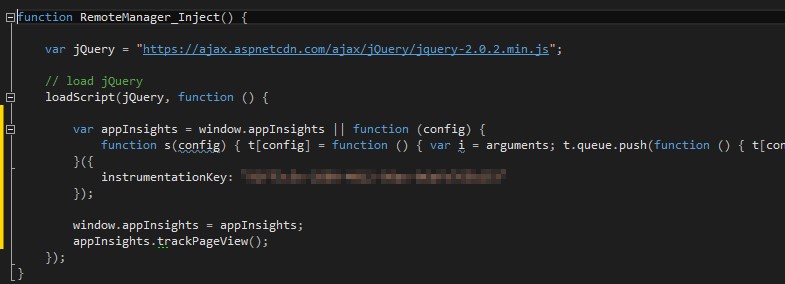
The JavaScript file is called “scenario1.js” and is located under Content:
- Open this file, and modify the RemoteManager_Inject method
- Replace the contents of the loadScript() inner function with the Azure Application Insights JavaScript
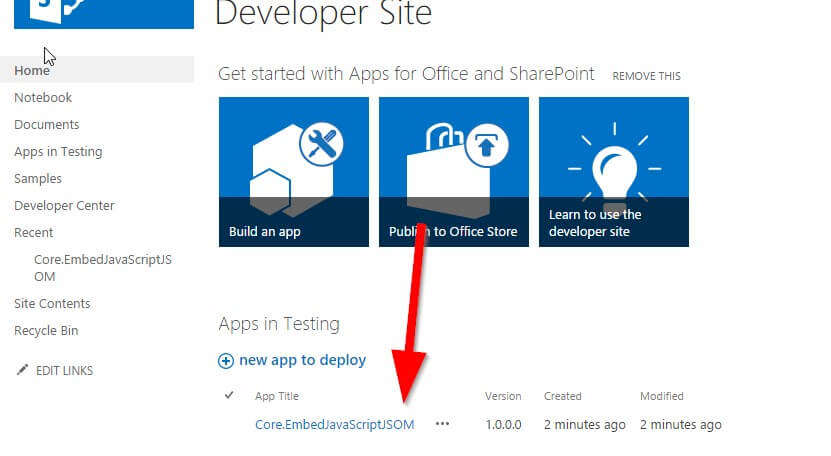
Hit F5 to deploy the app to your developer site. Your browser will open after deployment, and should show that the app has been installed:
Next you’ll need to grant the app permissions:
- Click on the three dots to open the context menu
- Click “Manage permissions”
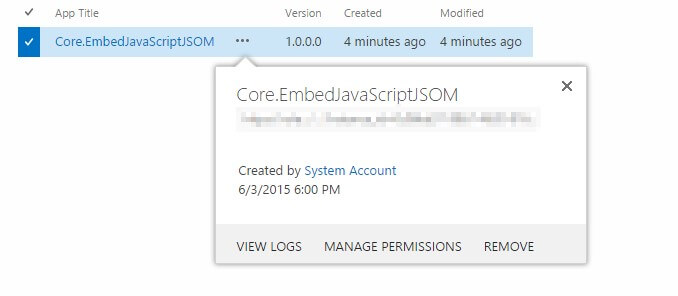
- On the next page, click “Trust it”

Now that the app has full control, we’re ready to run it:
- On the start page, click on the app to open it
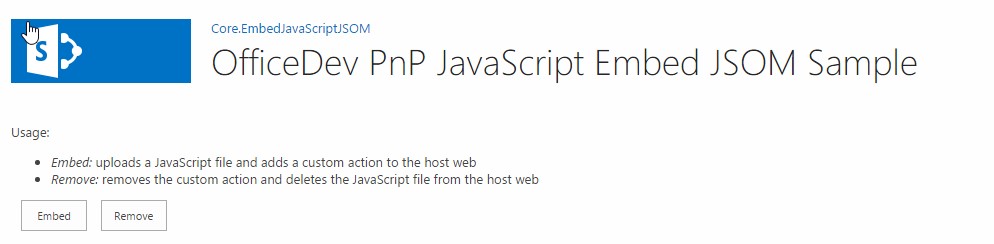
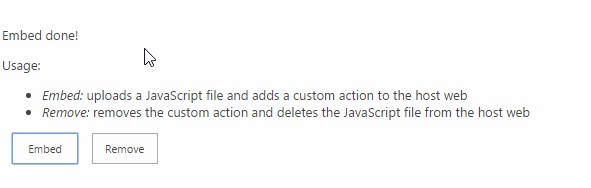
- Hit Embed to inject the JavaScript in your site
- You should see a confirmation:
Time to see results!
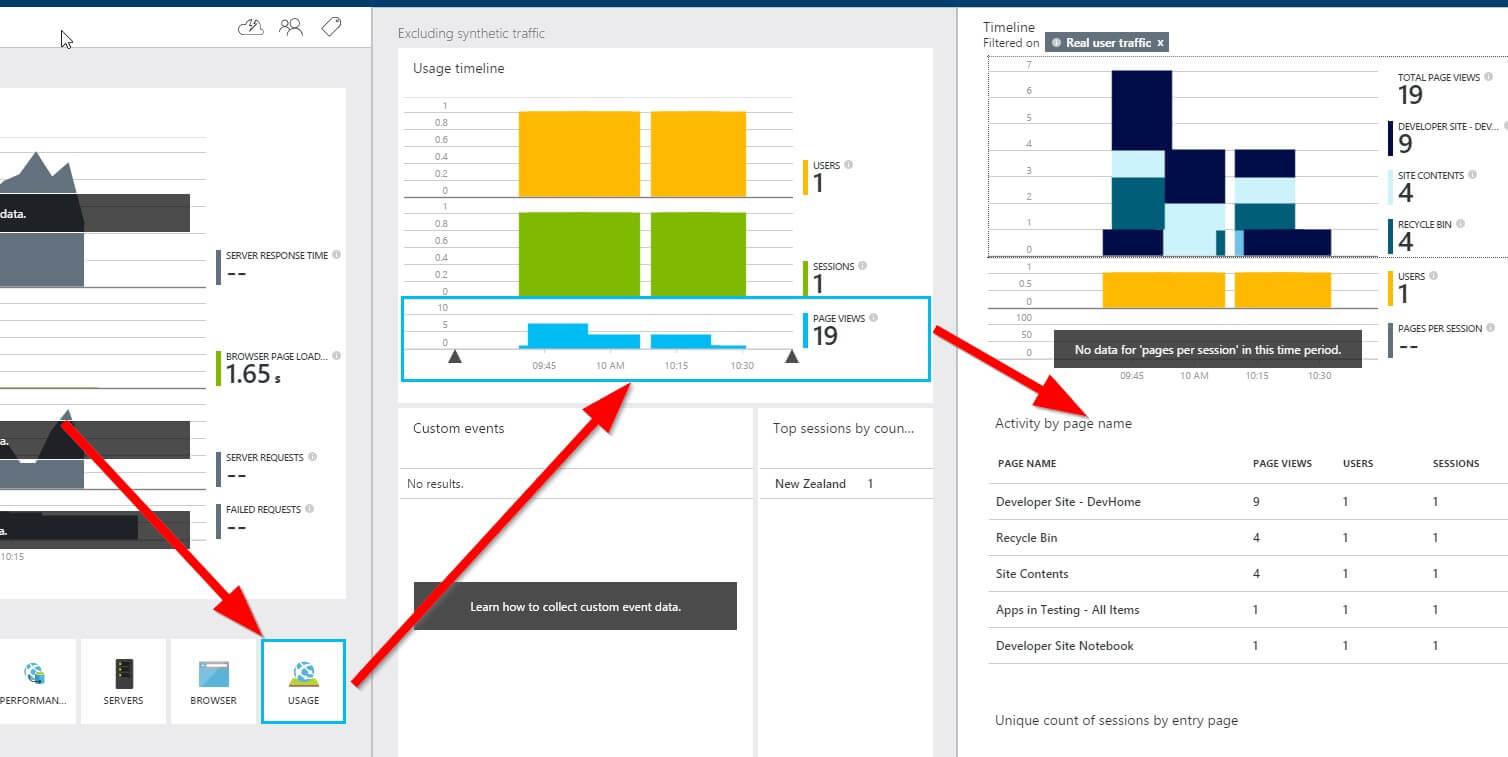
Everything should be configured correctly now. Browse through your developer site, click on different pages, and go grab a cup of coffee. After a couple of minutes you’ll see the results in the Azure Analytics portal:

You can see the average response times, number of page views, etc. As the developer site uses Minimal download strategy by default, all URL’s are “…/_layouts/15/start.aspx”. Azure thinks there is only one page, while I visited different pages. However, there is a way to see the different page titles:
- Click on Usage -> Page views to see a drilldown of the different pages
Custom events
Now we have the basics set up, let’s look at capturing custom events. For example, you may want to track the number of times people click on an external link.
Add the following piece of JavaScript after the call to trackPageview():
$(document).ready(function() {
            $('a[href^="//"],a[href^="http"]').not('[href*="' + window.location.hostname + '"]').click(function() {
                window.appInsights.trackEvent('External link clicked');

        });
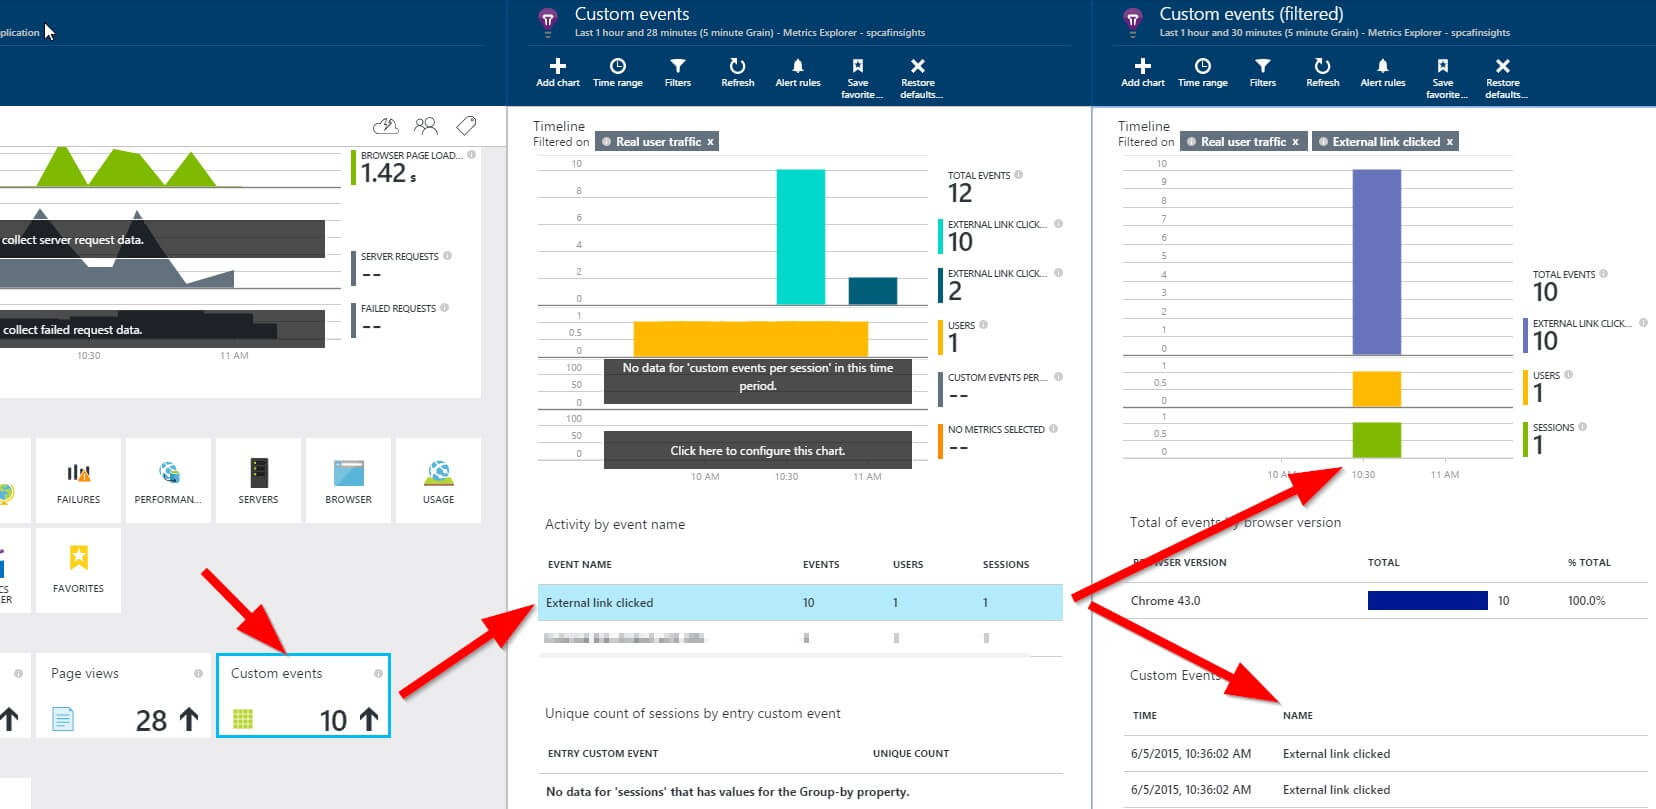
The parameter is the name of the custom event. Deploy the new JavaScript again by deploying the app and clicking “Embed”. Every developer site has links to “Samples” and “Developer centre” in the left hand quick navigation, so we can use these two links to test our changes.
Click the Custom Events tile in Azure Analytics and you should see this event showing up.
However the simple fact that someone clicked a link is not very useful. We probably want to capture the URL of the link as well. You can attach properties and metrics to custom events. Properties are string values (like our URL), metrics are numeric values (like game scores).
Change the JavaScript call to:
$(document).ready(function() {
            $('a[href^="//"],a[href^="http"]').not('[href*="' + window.location.hostname + '"]').click(function() {
                window.appInsights.trackEvent('External link clicked with URL',
                {
                    Url : $(this).attr('href')
                },
                {});
            });
        });
Deploy again, and test by clicking an external link twice.
Wait a couple of minutes, and refresh the analytics page. A handy tip, the time you may have to wait is displayed in the header of each blade as “x minute Grain”:

This number changes constantly.
After the new events have come in, you can see the custom properties by clicking on one particular event:
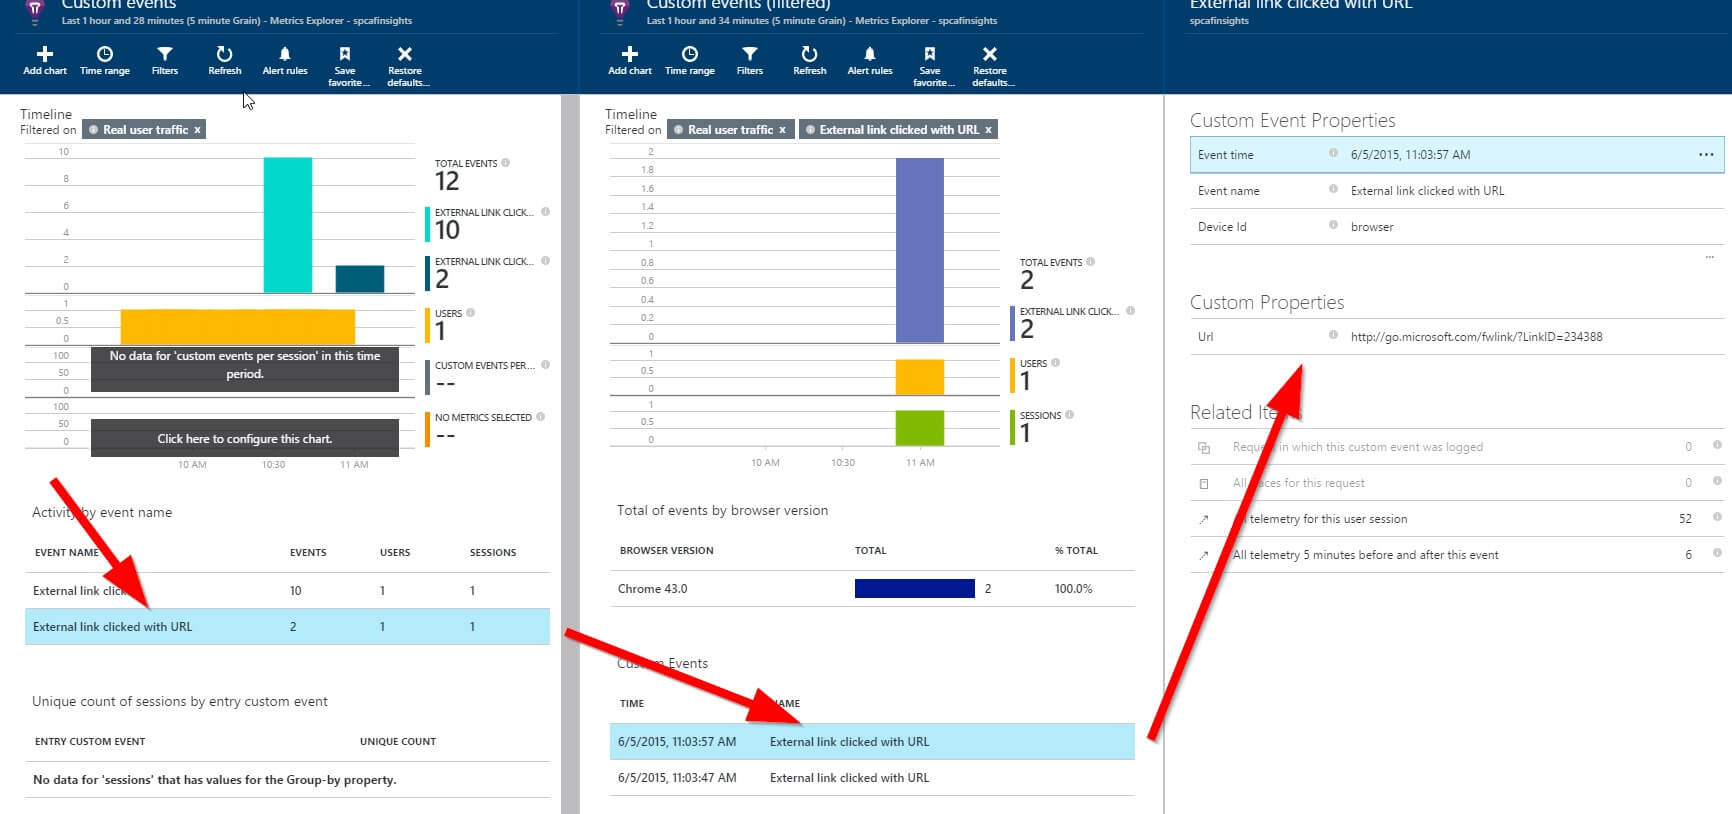
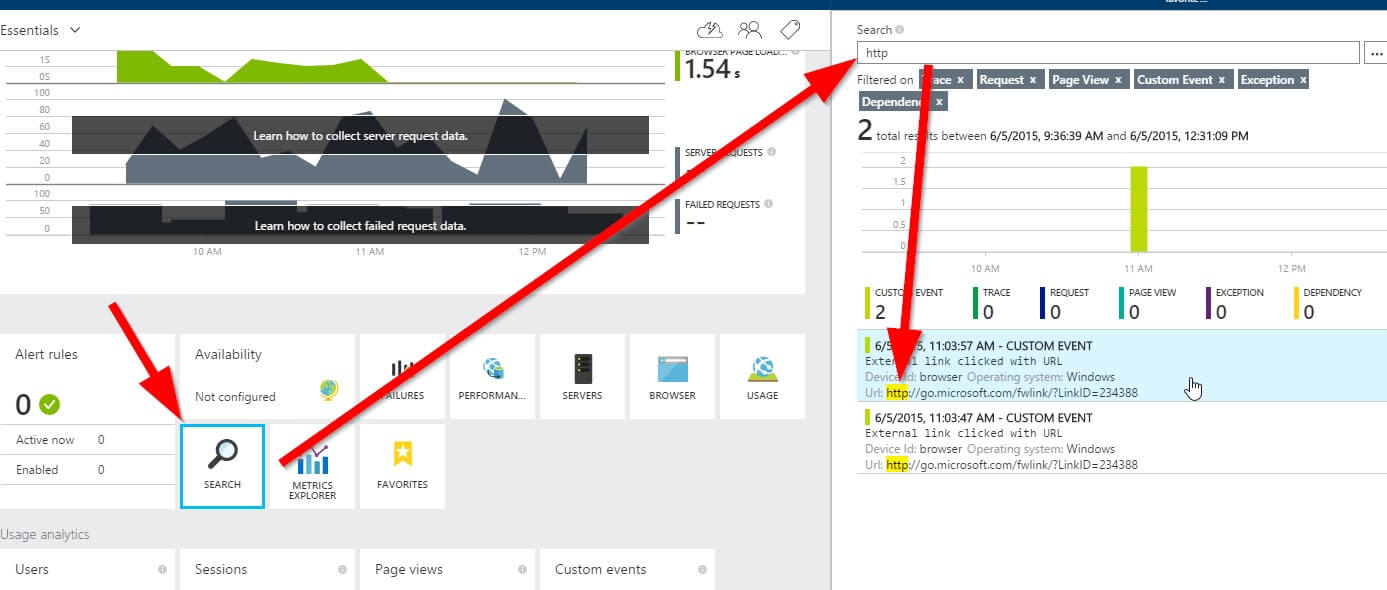
It is possible to create custom charts when you use custom metrics (numeric values), but it doesn’t seem to work that way with custom properties. However, the custom properties are searchable. Click on Search and type “http”. In our case, it will display the two custom event with the custom URL property:
Other features
We’ve discussed how to setup Application Insights with Office 365, and how to track custom events. There are many other features we have not discussed, but which will give valuable insights into the use of your Office 365 portal. Some use cases include:
- Track usage from custom apps (either provider hosted or SharePoint hosted), for example tracking custom pageviews, custom events with properties and metrics, etc. It’s also possible to track server metrics like CPU, memory, I/O, etc.
- Track workflows, for example by tracking each step in a workflow. This will give insight in how popular a workflow is, which steps are most frequently executed, and how long it will run.
- Create different reports. We’ve discussed how to add custom charts to display event properties, but there are a million variables and properties you can use in your charts. You can create bar charts, line charts, etc. etc.
There is a lot of excellent documentation and videos on the Microsoft site: Start here, look here for custom event tracking, and here for creating custom metrics. It’s still in beta, so there will be many more features coming!
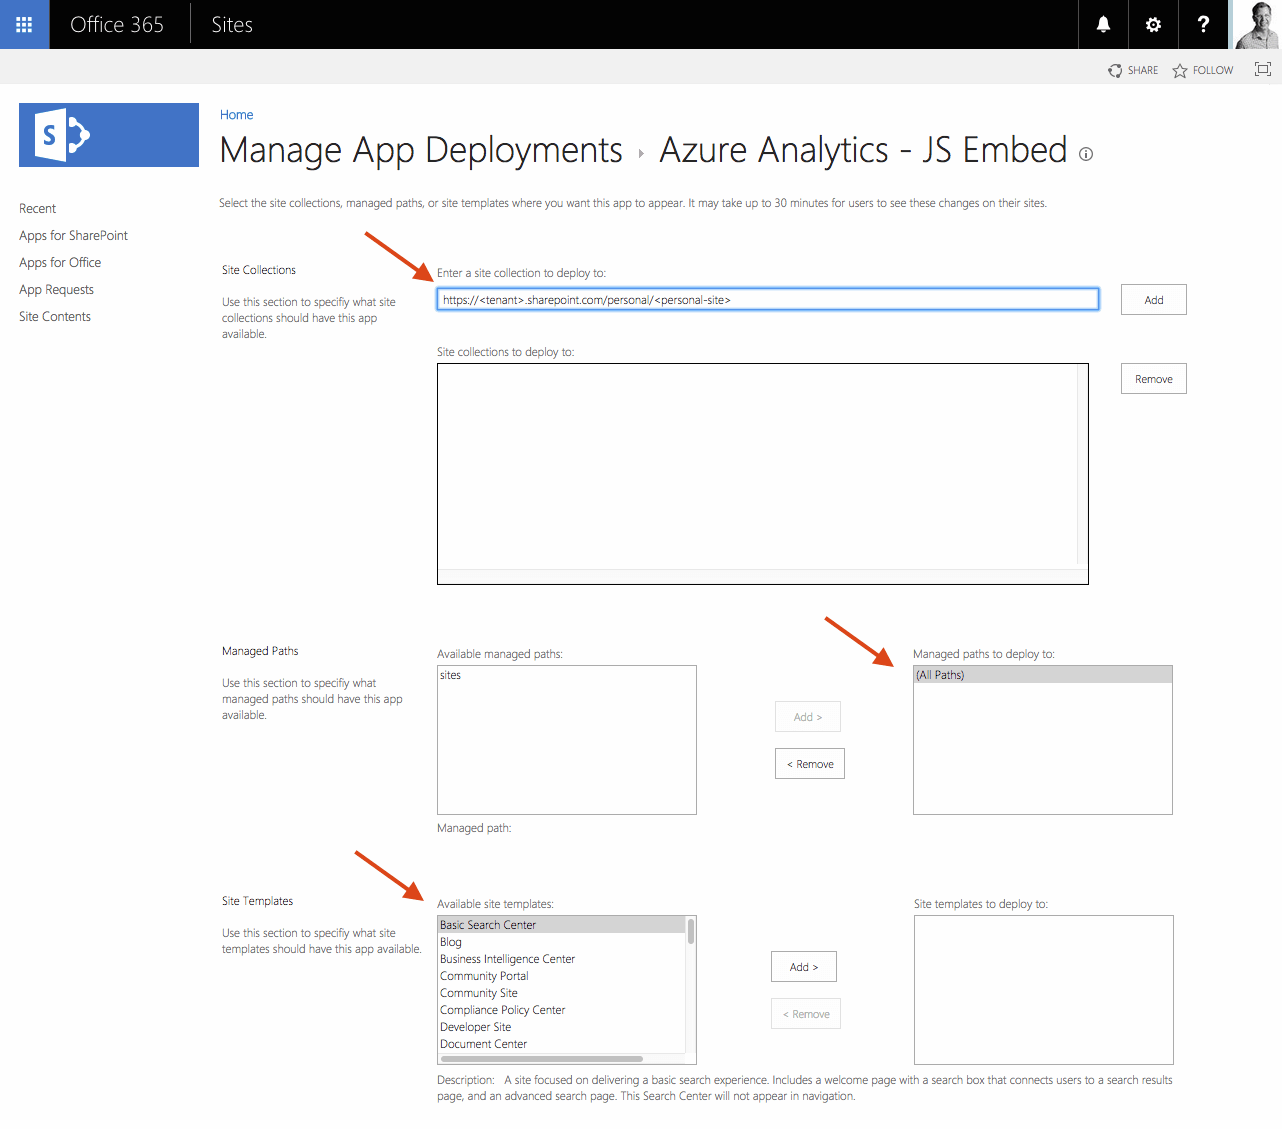
[Update: 2015/06/30: Central App deployment]
The question came up if this can be deployed to all site collections within a tenant (or SharePoint on-premises web application).
Note, this has nothing to do with the Azure Analytics solution described in this post and applies to all apps that you want to deploy to multiple sites,
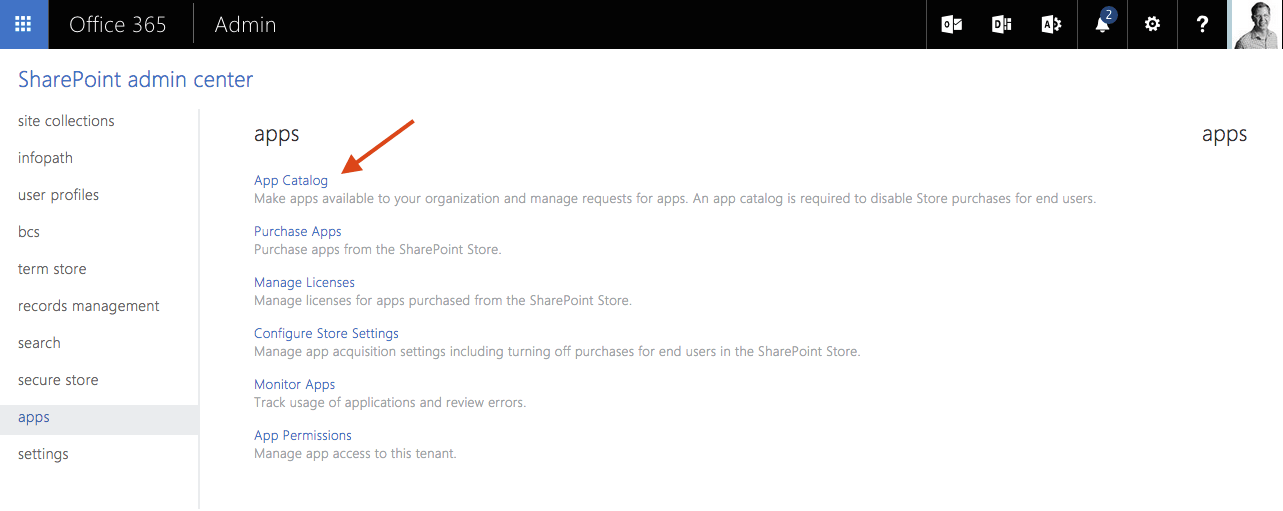
To achieve this, you require an App Catalog that you can create in your SharePoint admin center of your Office365 tenant.
Next you need “To install an app for SharePoint to multiple websites” as described here on MSDN.
Regardless of whether an app is installed from the Office Store or from an app catalog, tenant admins can install it to multiple websites in a tenancy, uninstall it, and update it by using the following procedures.To install an app for SharePoint to multiple websites
- Navigate to the Site Contents page of the corporate catalog website.
- Select Add an app and install the app just as you would on any other SharePoint website.
- After the app is installed, hover over the link to the app in the Site Contents page. A “…” link appears.
- Select the link, and a callout appears.
- Select Deployment on the menu.
- Use the deployment UI that opens to specify the site collections to which you want the app installed. You can filter by managed paths, site templates, or URLs. The filters have a logical “OR” relationship: the app is installed to the union of all the site collections that pass any one or more of the filters.
- Select OK.
Apart from ordinary site collections, the mentioned deployment UI allows you also to add OneDrive 4 Business urls, entire managed paths or site templates as shown in the screenshot below.
I am currently unaware if it is also possible to automatically deploy the app to all OneDrive for Business sites of your tenant because the UI only lists the managed paths of your <tenant>.sharepoint.com web application.